")
")
")
")
")


 Specialized operating systems for mining cryptocurrencies on video cards and ASICs continue to gain popularity among miners, especially now that Ethereum mining on video cards with 4Gb video memory is only available on Linux and Linux-based OS. One such Linux-based operating system for miners is called RaveOS, which is one of the best solutions on the market. RaveOS offers a wide range of functionality for managing and monitoring mining rigs, in addition, stable operation and timely updates of miners can be noted. For beginner miners, RaveOS offers a free service for 3 GPU rigs or 3 ASICs. The service cost for owners of 4 or more installations is $ 2 USD per month for each connected device. If you are interested in this offer, then we will tell you how to install and configure RaveOS for cryptocurrency mining.
Installing RaveOS on a GPU mining rig.
1. First you need to register on the Raveos.com website.
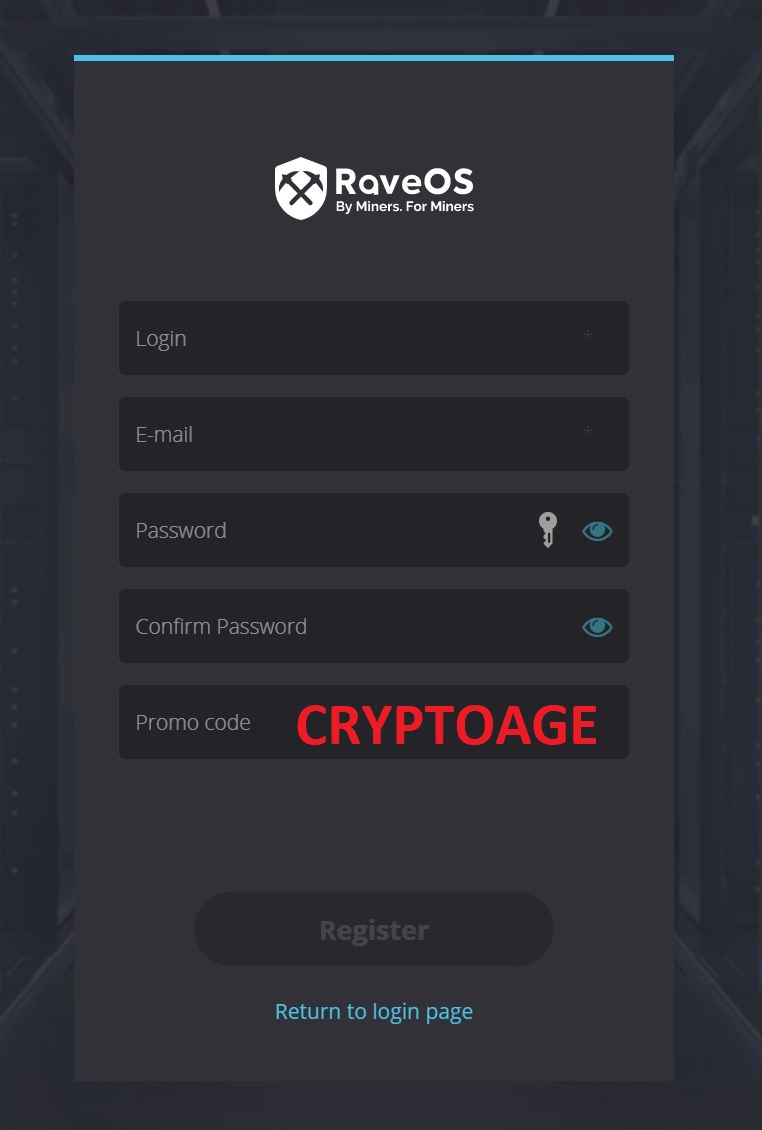
Registration is standard: specify login, mail and password. Enter CRYPTOAGE in the Promo code column
2. Confirm registration - follow the special link in the letter that will come from the RaveOS service.
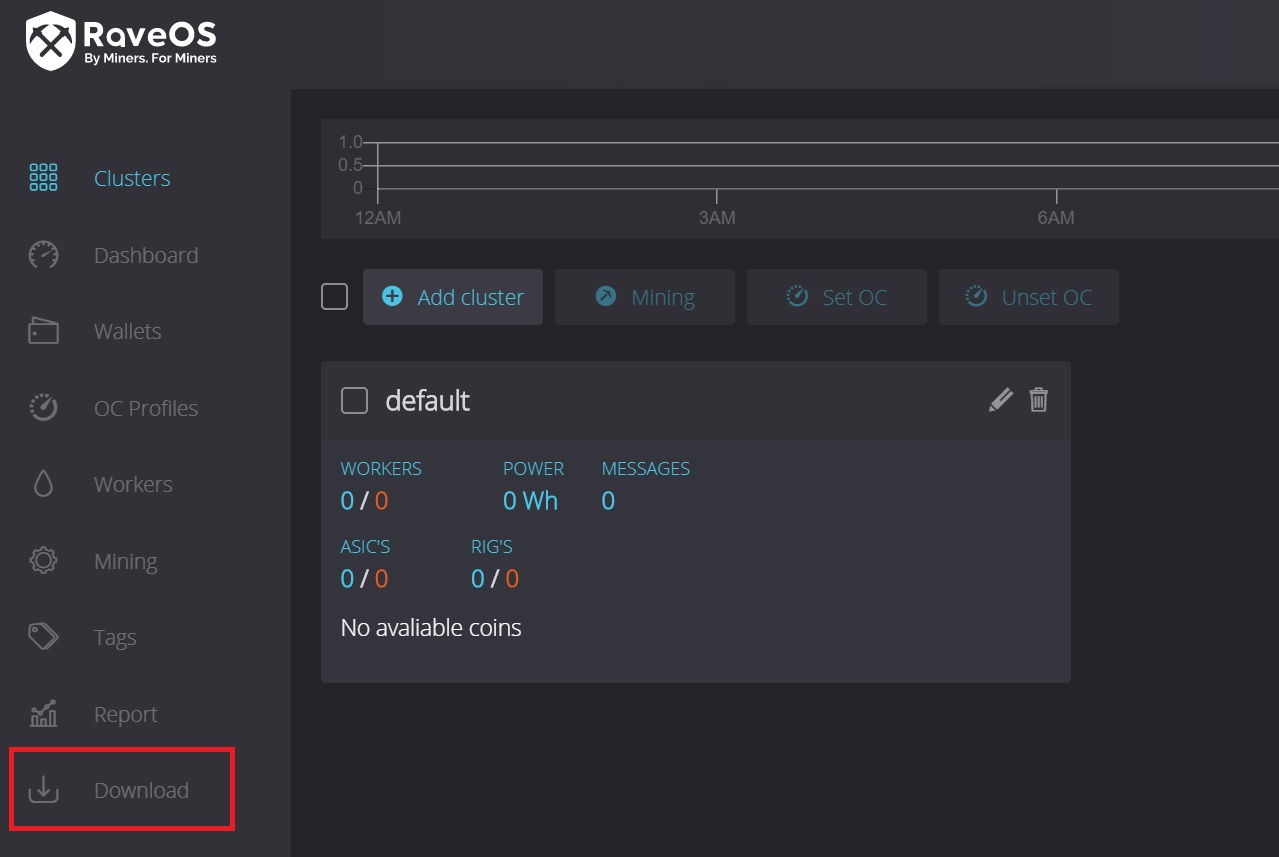
3. Go to your personal account and download the operating system image for writing to a USB flash drive. An 8Gb flash drive is enough for recording RaveOS. DOWNLOAD button in the menu.
4. Unzip the downloaded file.
5. Download HDD RAW Copy Tool.
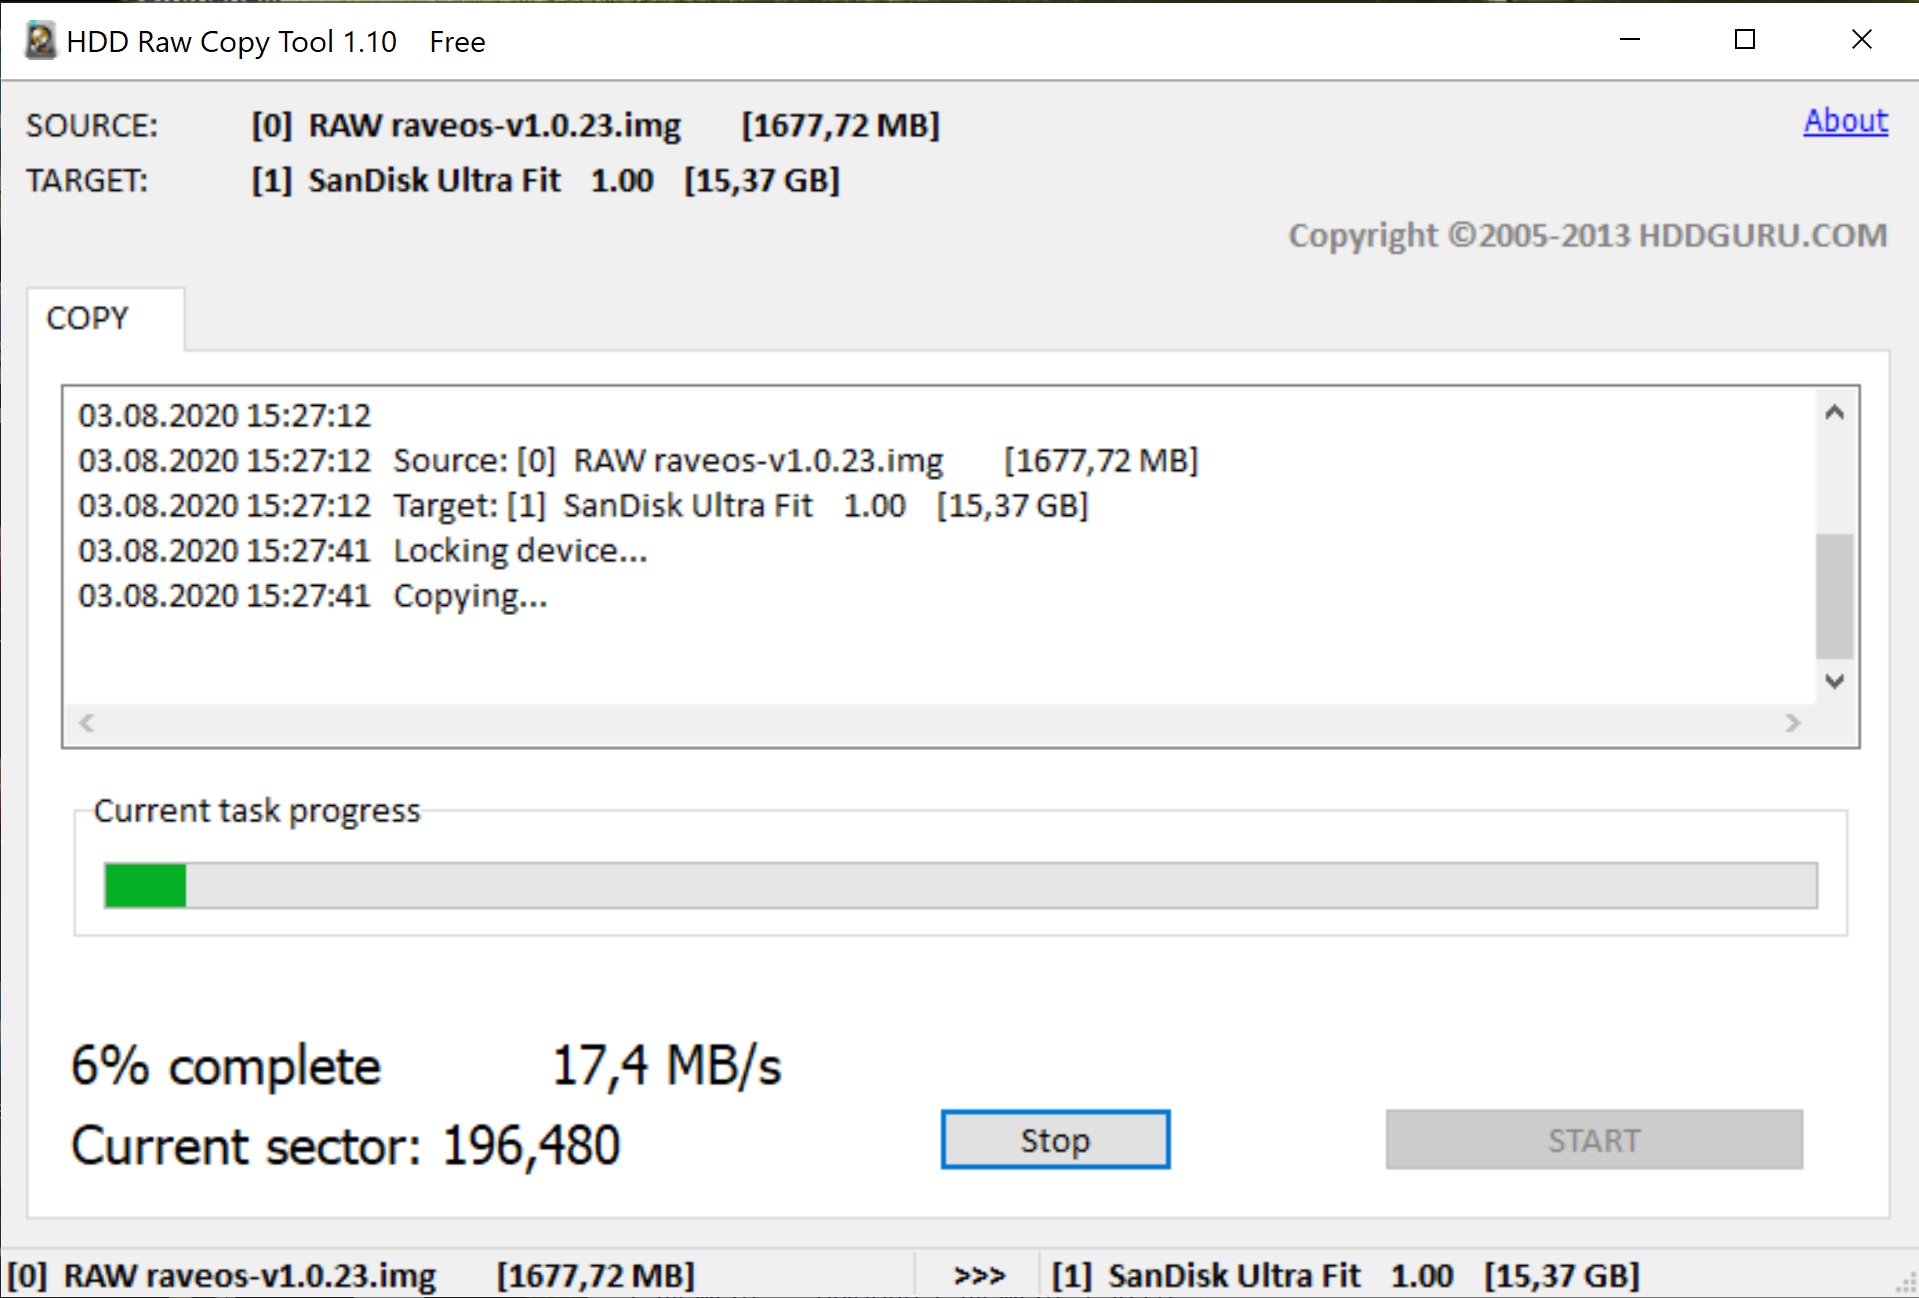
6. In the HDD RAW Copy Tool, select the FILE option and point to the file that you received after unzipping at step 4.
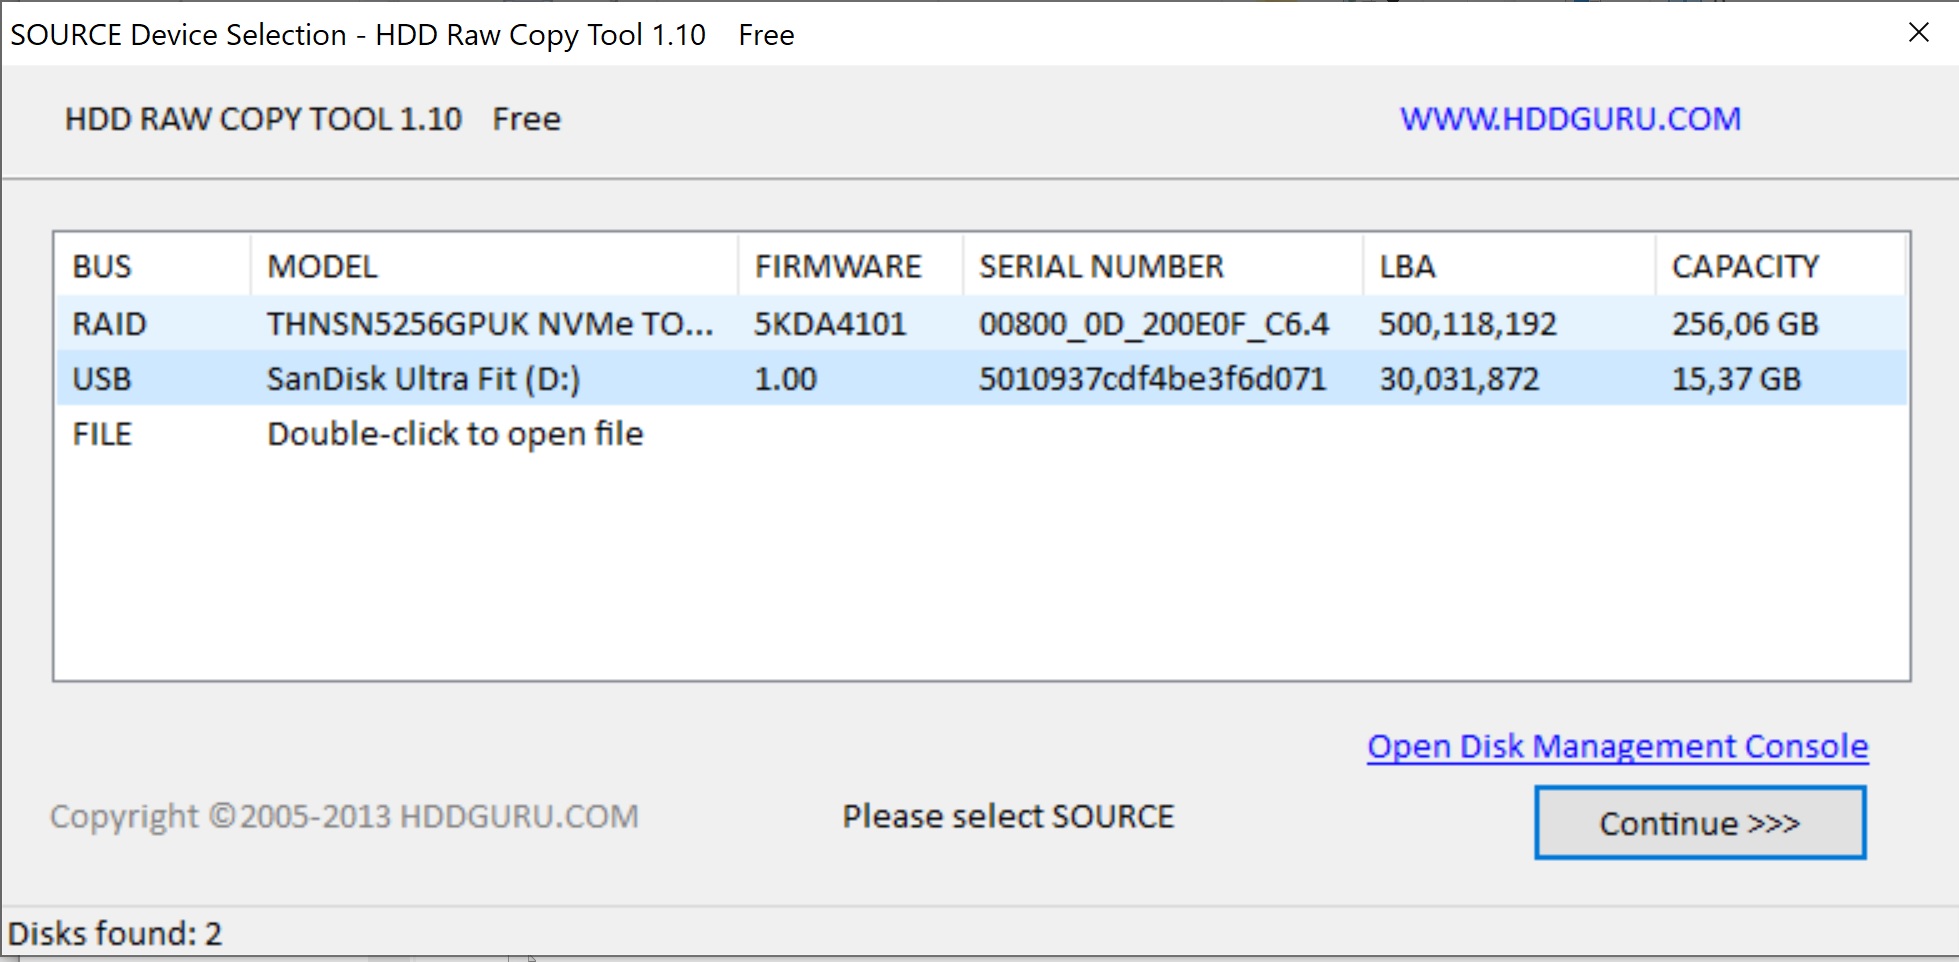
Click on the CONTINUE button
At the second step, we indicate where we will write - select USB. Be careful in this step. since you can lose all data on other storage media if you specify the wrong place to write the RaveOS image.
We are waiting for the completion of writing the RaveOS image to the USB flash drive.
Instead of HDD Raw Copy Tool, you can use the balenaEthcer program, in more detail how to use this application, we described Install and configure HiveOS - Linux operating system for GPU mining rigs and ASICs
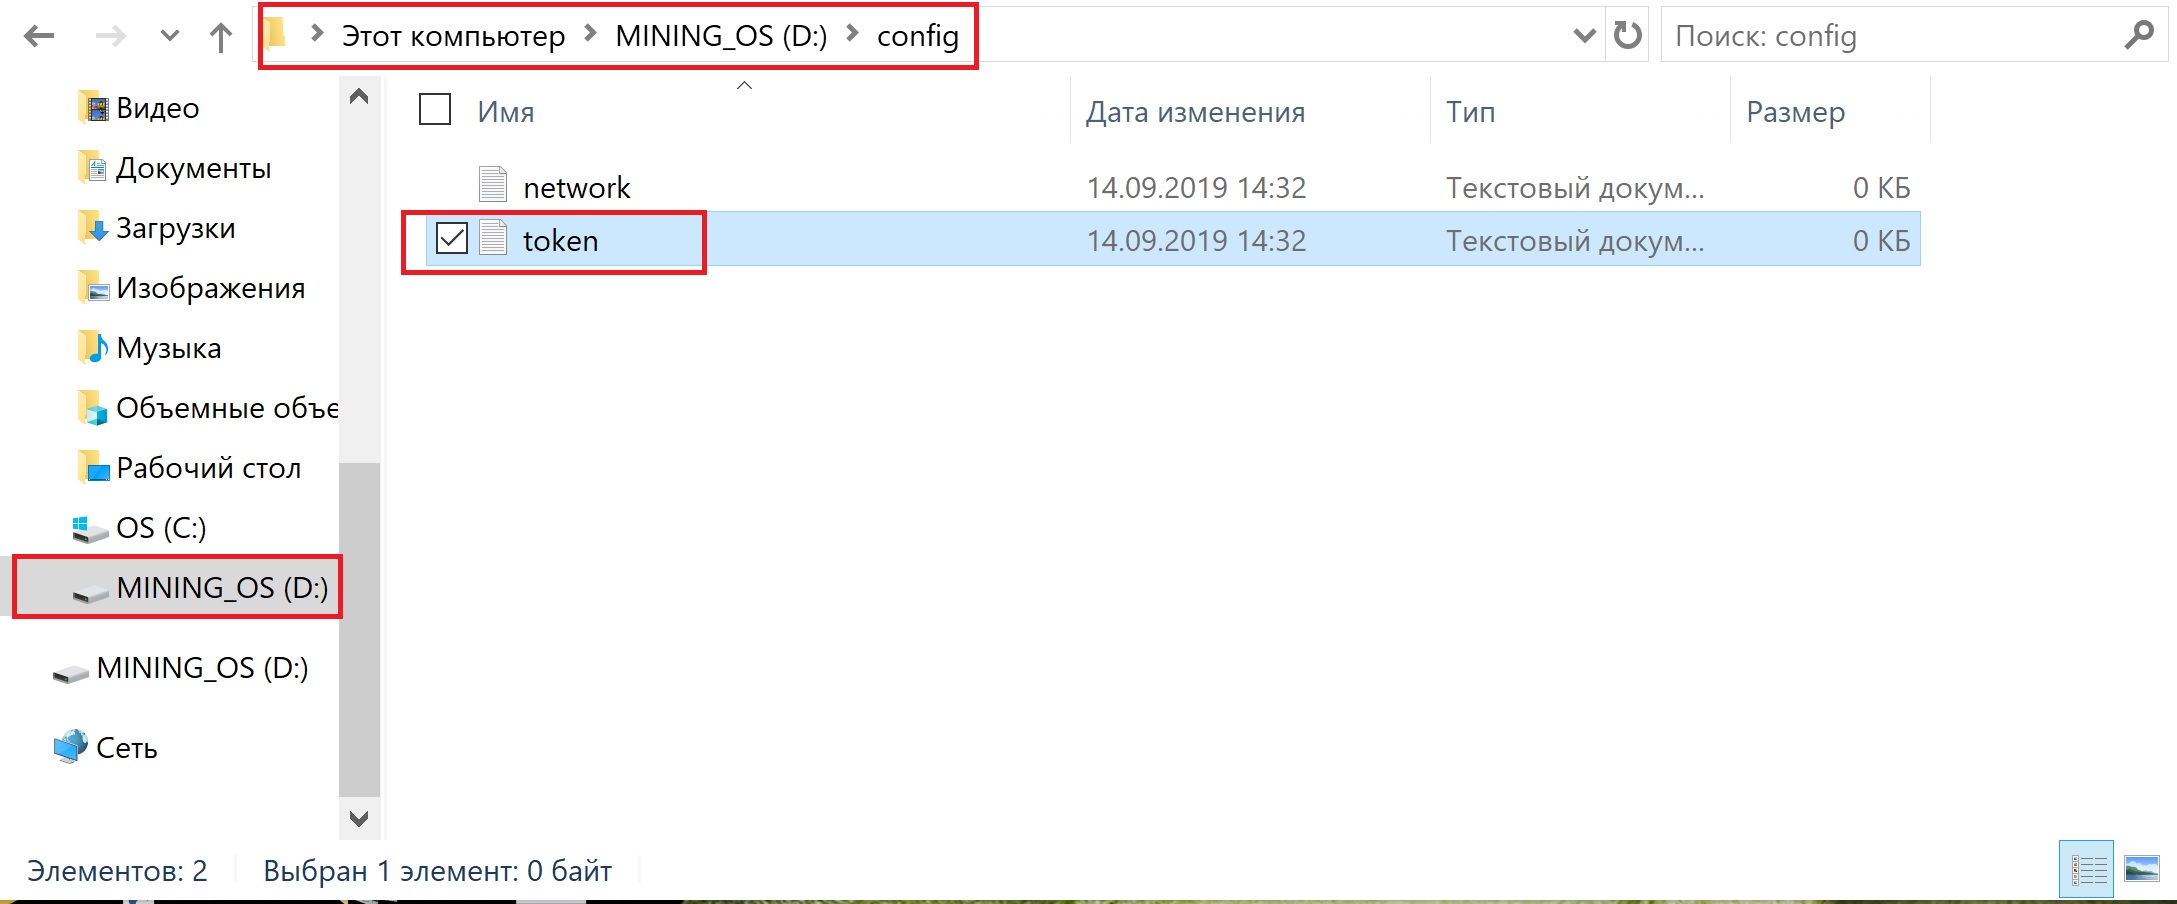
7. On the created bootable USB flash drive, open the token.txt file (MINING_OS / config) and write the Workers Token into it.
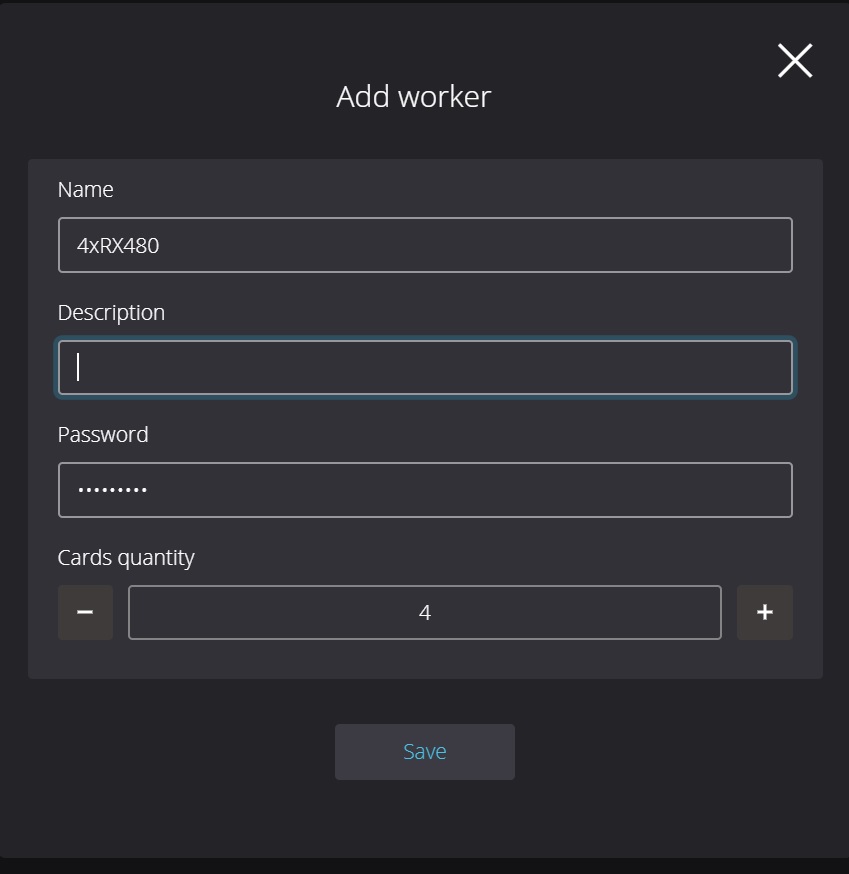
8. Workers Token can be found in the Worker settings, but first you need to create it.
If you have many mining rigs and they are located in different places, then in RaveOS it will be convenient for you to divide your mining rigs into clusters. Before creating Workers, create the required number of clusters and create a Worker in the required cluster. If division into clusters is not important for you, then just create a worker in the already created cluster by default "DEFAULT"
In the settings of the created worker, go to the SYSTEM INFO tab
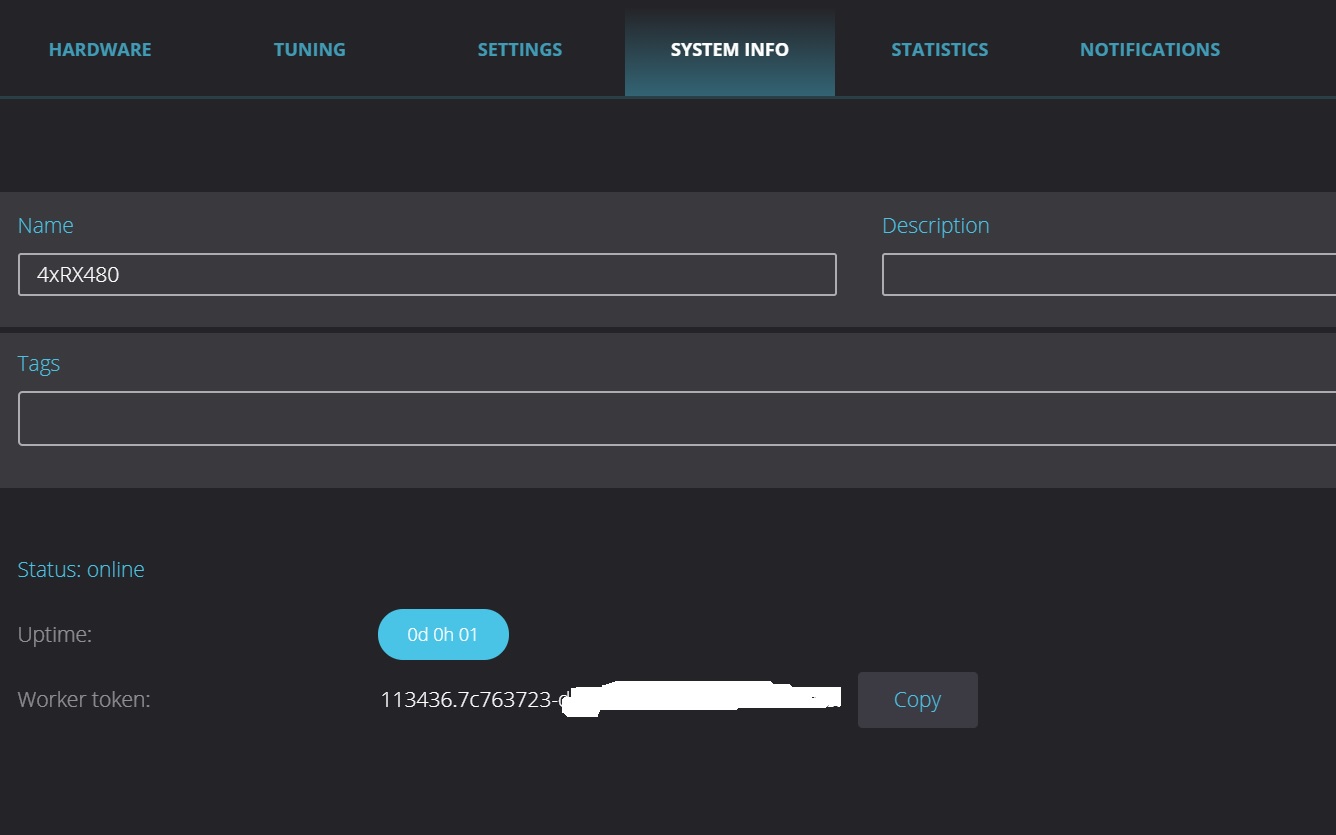
Copying Workers Token - Copy button
9. Save the copied Workers Token to the token.txt file on a USB flash drive. See point 7.
10. The Network file on the flash drive is needed to configure your mining rig connection via Wi-Fi. If the connection is wired, this file does not require modification.
11. Connect the created bootable USB flash drive with RaveOS to your mining rig with video cards and enable it. Set the priority for booting from USB in the BIOS of your rig motherboard.
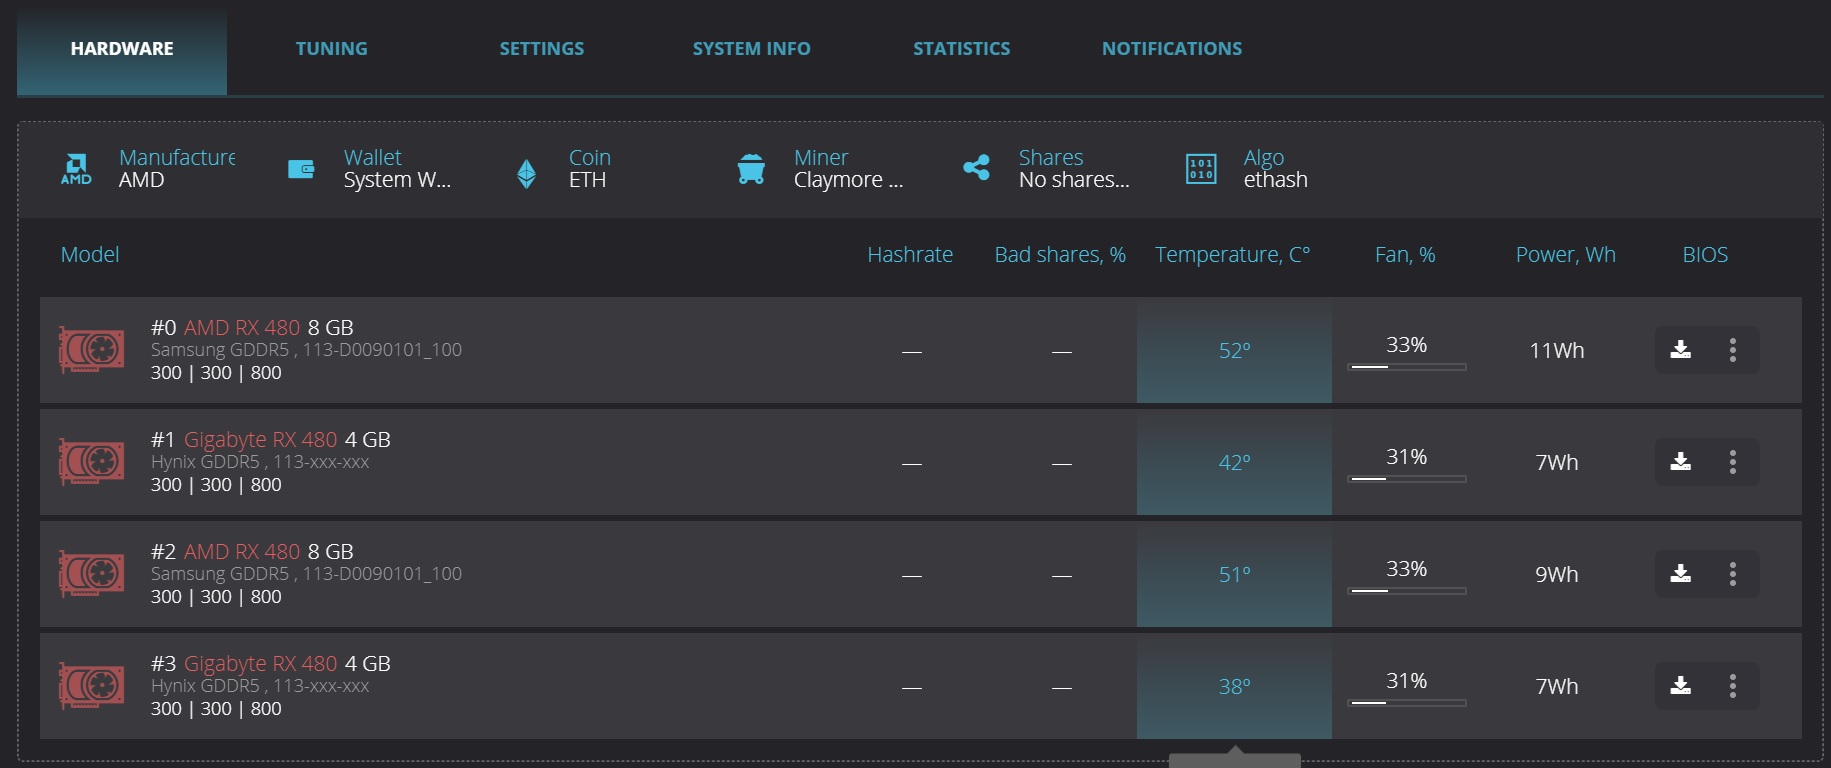
12. If you have correctly installed RaveOS on the USB flash drive, then in the menu of the created worker you will see all the connected video cards, as in the screenshot below.
Configuring RaveOS for mining cryptocurrencies on video cards
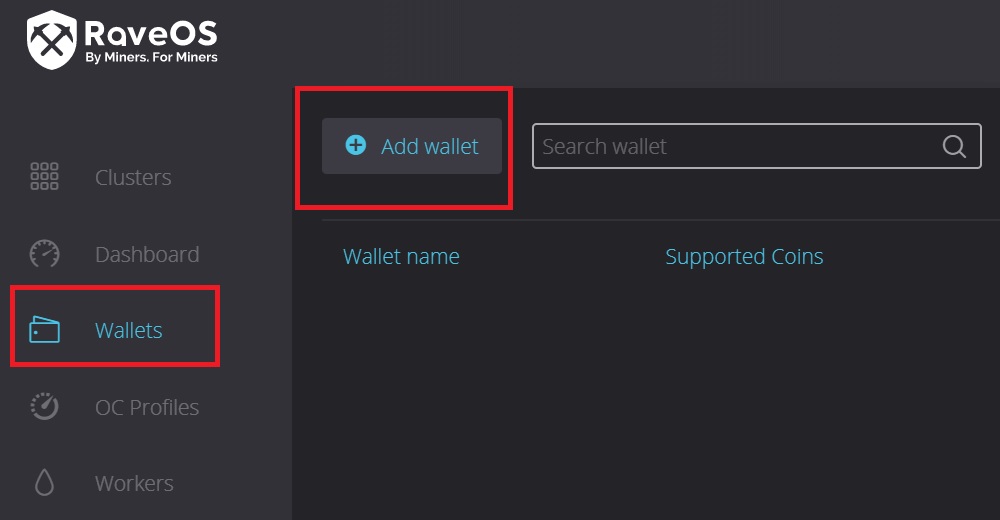
1. Setting up RaveOS begins with creating a Wallet. Wallet Menu - Add Wallet
Coming up with the name of the Wallet. In our case, the wallet is called Ethereum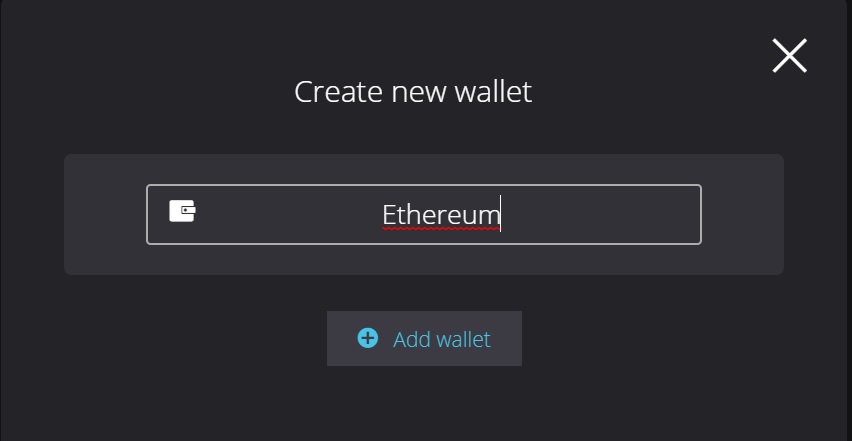
Next is the most important configuration item. Where you need to choose a cryptocurrency (Coin) from the list, the pool for mining is also from the list. We recommend choosing Binance Pool. Next, for the pool, select connection settings (select a server), specify the address of your cryptocurrency wallet for the selected cryptocurrency, and the last thing is to select the miner.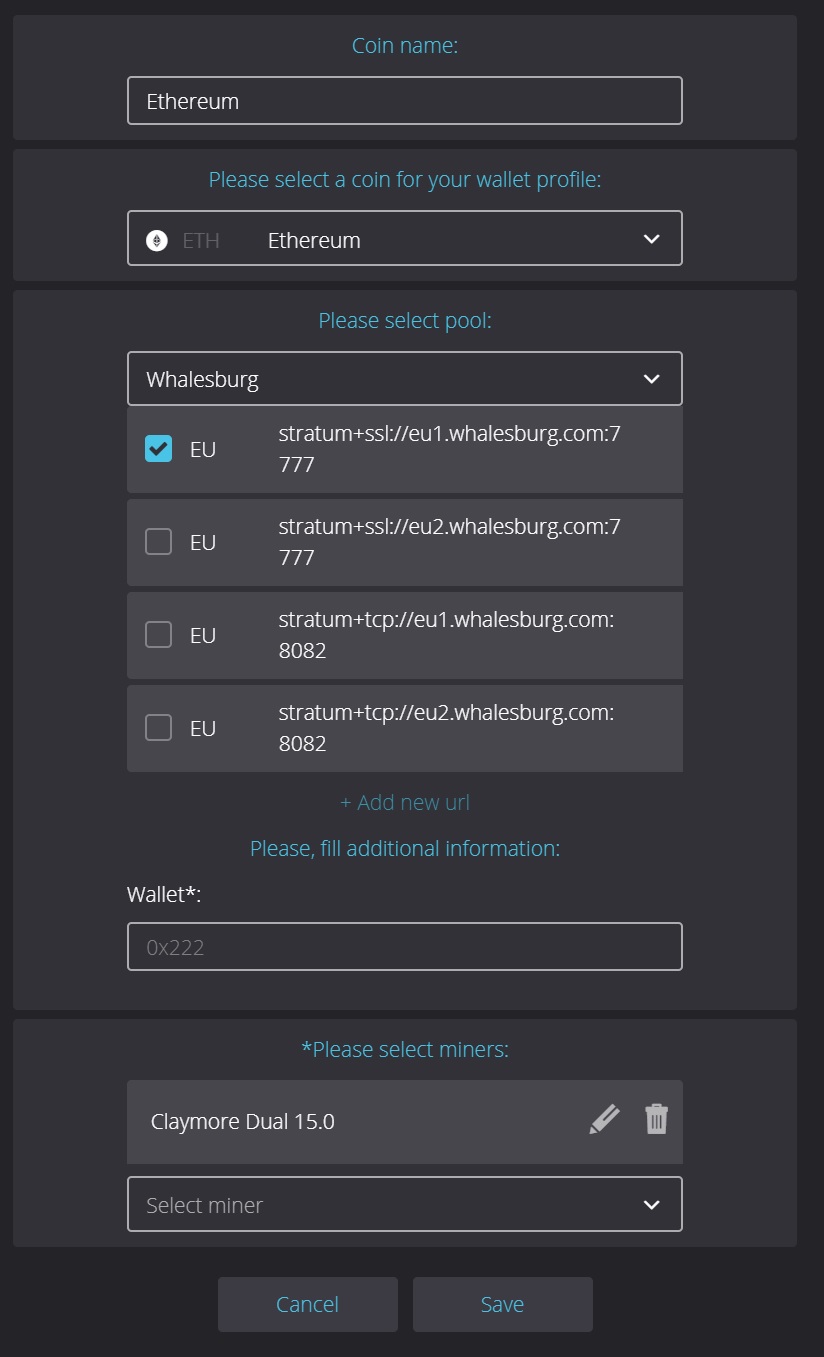
In our case, We chose the Ethereum cryptocurrency, the Whalesburg mining pool, and indicated the pool server from the list with which we will work. In the Wallet column, the Ethereum wallet on the Binance exchange was indicated. As a miner, ETH chose the popular software - Claymore.
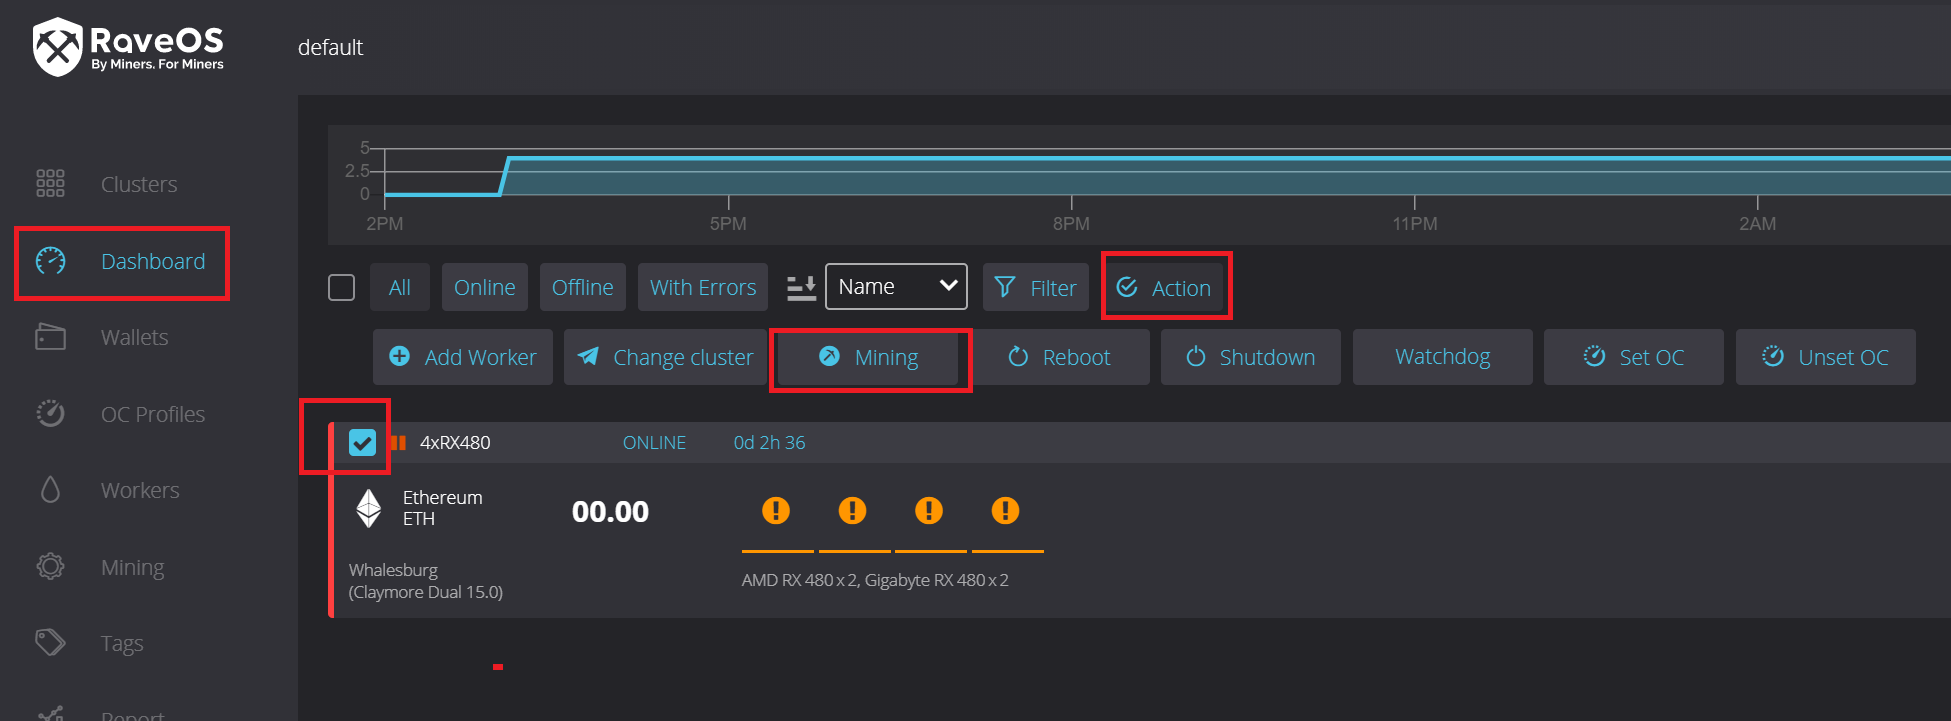
2. Launching mining on RaveOS.
Dashboard - put a checkmark in front of the created rig - Select the ACTION button - then MINING
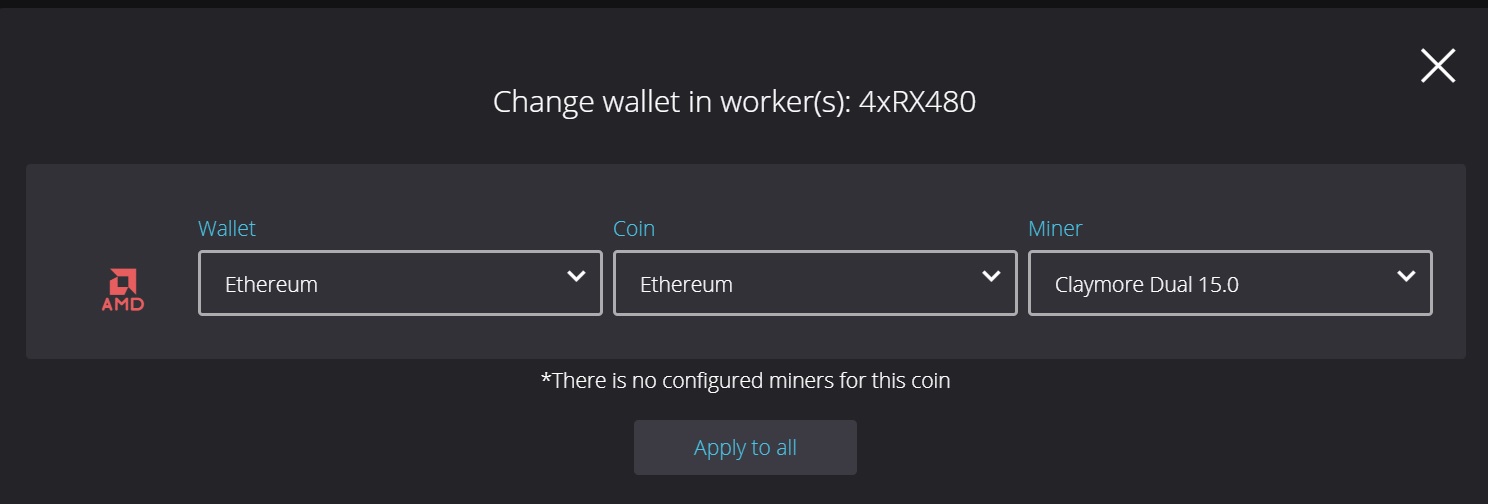
Next Select Wallet, Coin, Miner from the list. The choice depends on the different wallets created. Click on APPLY TO ALL
If you click on the rig name (4x480) in the Dashboard menu. then you can get into the setup rig. Here you can also start, stop mining or restart the entire rig entirely.

In this window, you can download the BIOS of video cards for editing, do this if you know exactly what you are doing. an error in the BIOS of the video card can disable it. Let's talk about changing the BIOS of video cards in a separate article.
3 Additional Raveos configuration
There is also a TUNING tab in the rig settings, let's go into it to change the frequencies of the memory and GPU.
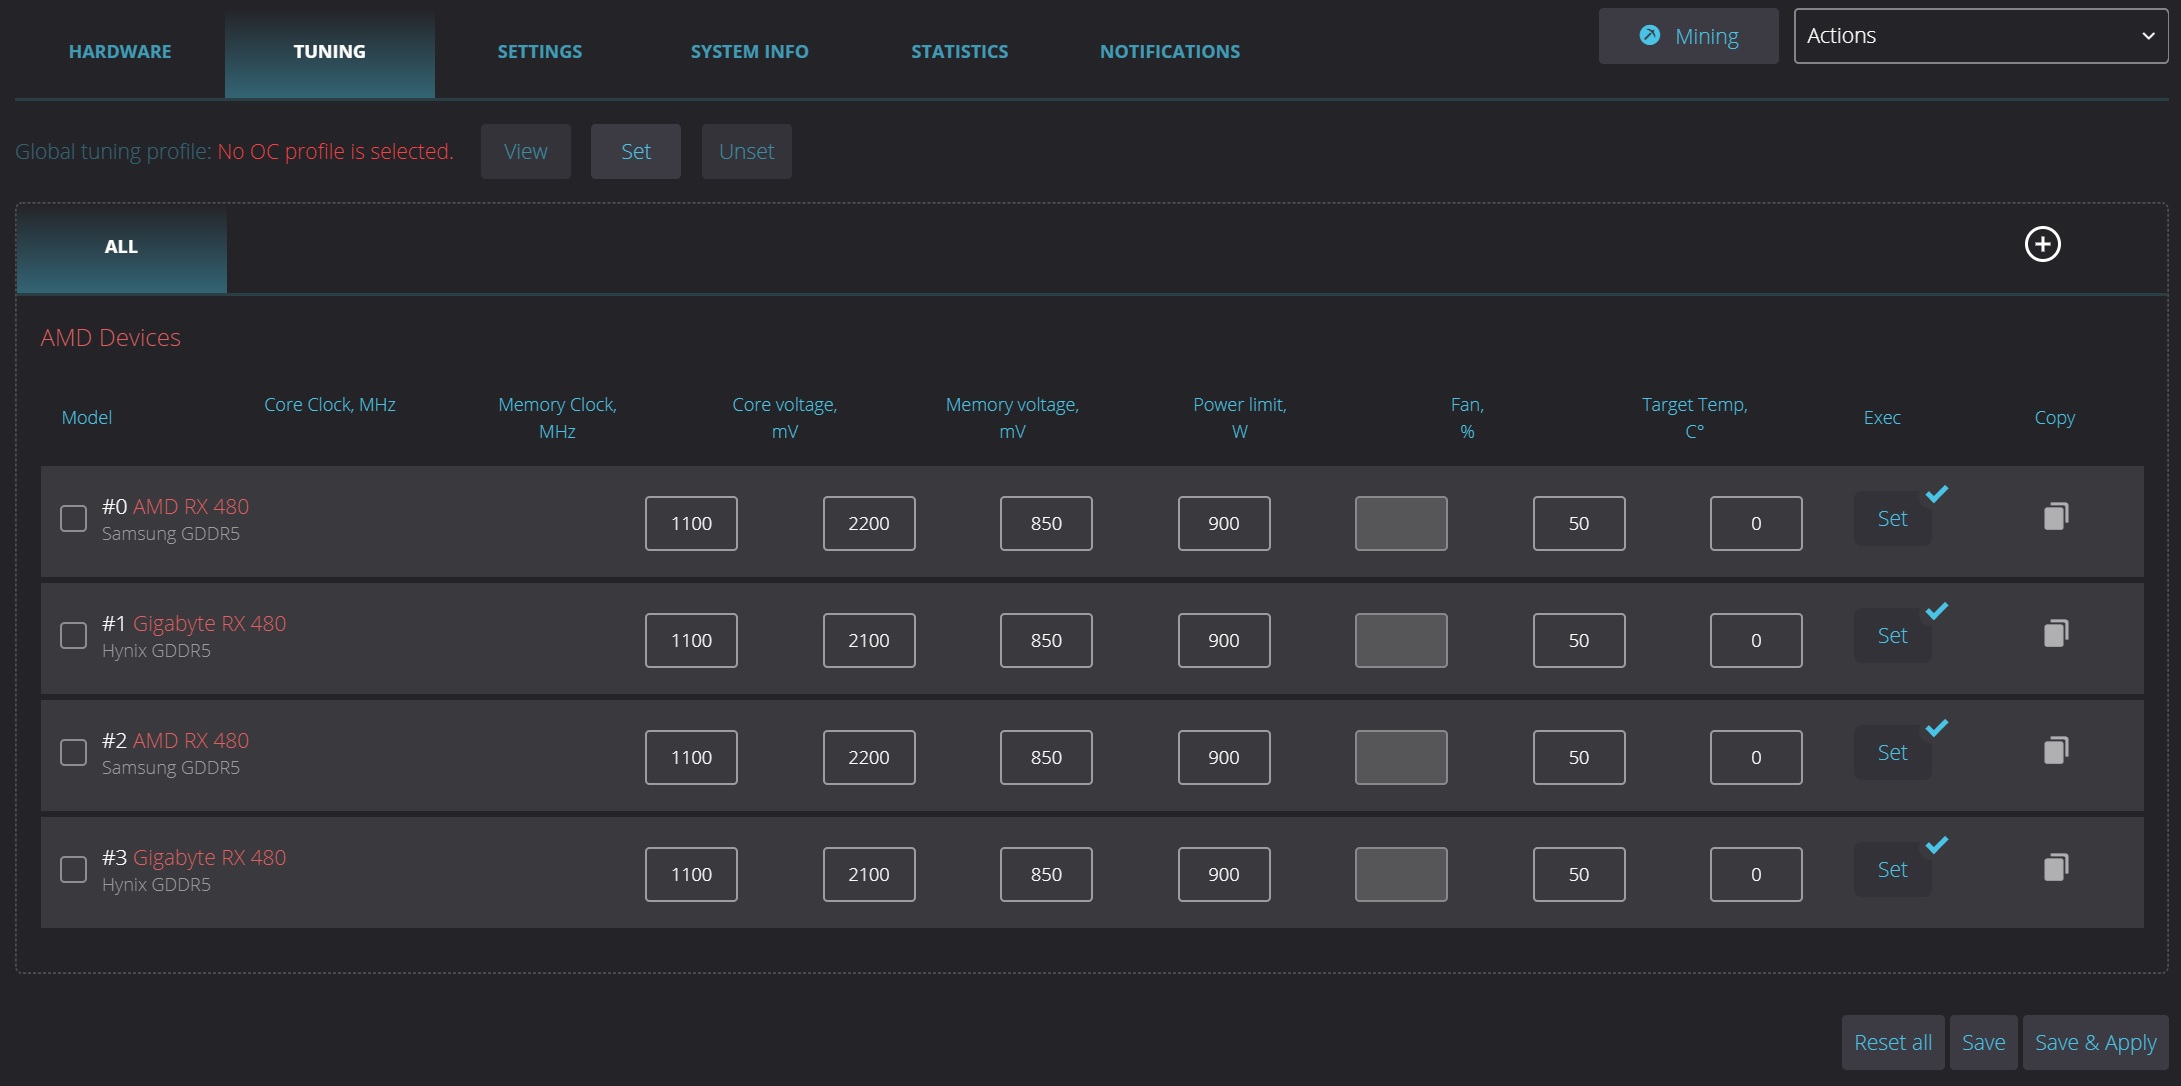
In the tuning menu, you can change the core frequency, memory frequency, core and memory voltage, fan speed.
Here you can also set additional commands for a single video card or all at once - the Exec button
For AMD video cards, for example, you can specify the amdmemtweak --REF 30 command or any other command for the amd memory tweak program.
Which will increase the hash rate of these video cards by 5% in Ethereum mining.
All settings of video cards can be saved as for all algorithms by default tab "ALL" or click on the + button on the right and create overclocking profiles for a specific mining algorithm.
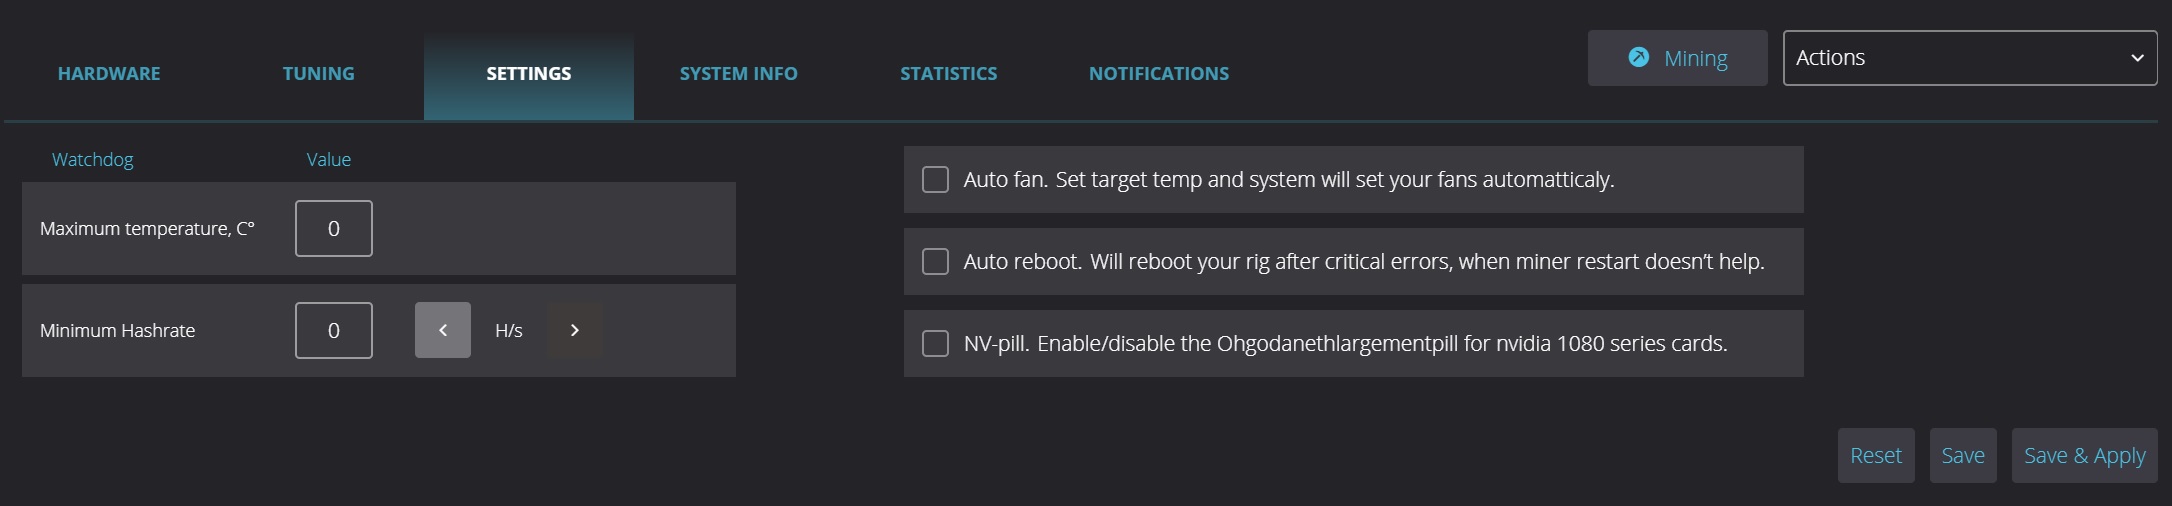
The SETTINGS tab is responsible for enabling Ohgodanethlargementpill for Nvidia video cards with GDDR5X memory, enabling watchdogs for temperature and hash rate, as well as enabling automatic control of video card fans and auto-restarting mining rigs.
Updating RaveOS to the latest version.
The only thing to find fault with the functionality of the operating system is the lack of a convenient one-click update functionality, as is done with HiveOS.
There are currently two ways to update RaveOS:
The first way is to download the image with the new version of RaveOS from the site and re-write it to the USB flash drive. This is a straightforward, but not fast way.
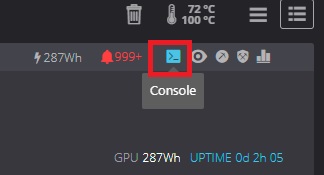
The second way is to update using the RaveOS console. To do this, go to the Dashboard, where there will be a console icon in the right corner of each worker.
Enter login and password. By default, all rigs have root login and admin password.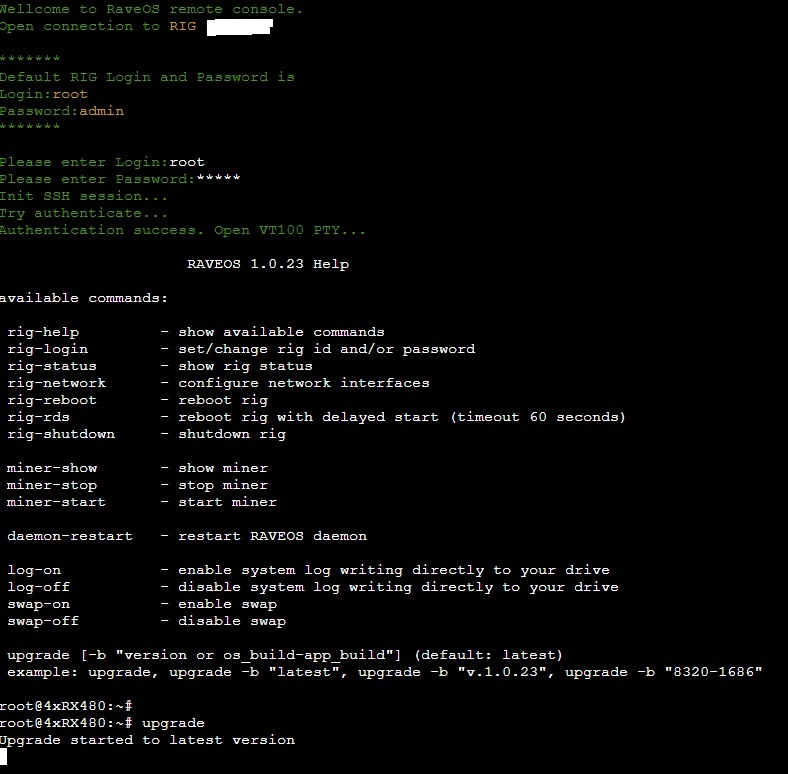
In the RaveOS rig management console, enter the upgrade command. After that, your GPU rig will be updated to the latest version. If you need a specific version of RaveOS, you can add the version number to the upgrade command to the upgrade command.
In addition, the console has another useful command - show miner. With the help of this command, you can watch the work of the miner as it was laid down by the developer of the miner.
Conclusion: Specialized operating systems for mining, including RaveOS, provide not only convenient and quick control over mining rigs, but also many other functions for setting up video cards and the operating system itself to facilitate working with mining equipment, especially if there are more than a dozen of them requires attention. Against this background, a fee of several dollars a month for the ability to quickly configure or identify a problem in the operation of the equipment sounds justified.