")
")
")
")
")


![]()
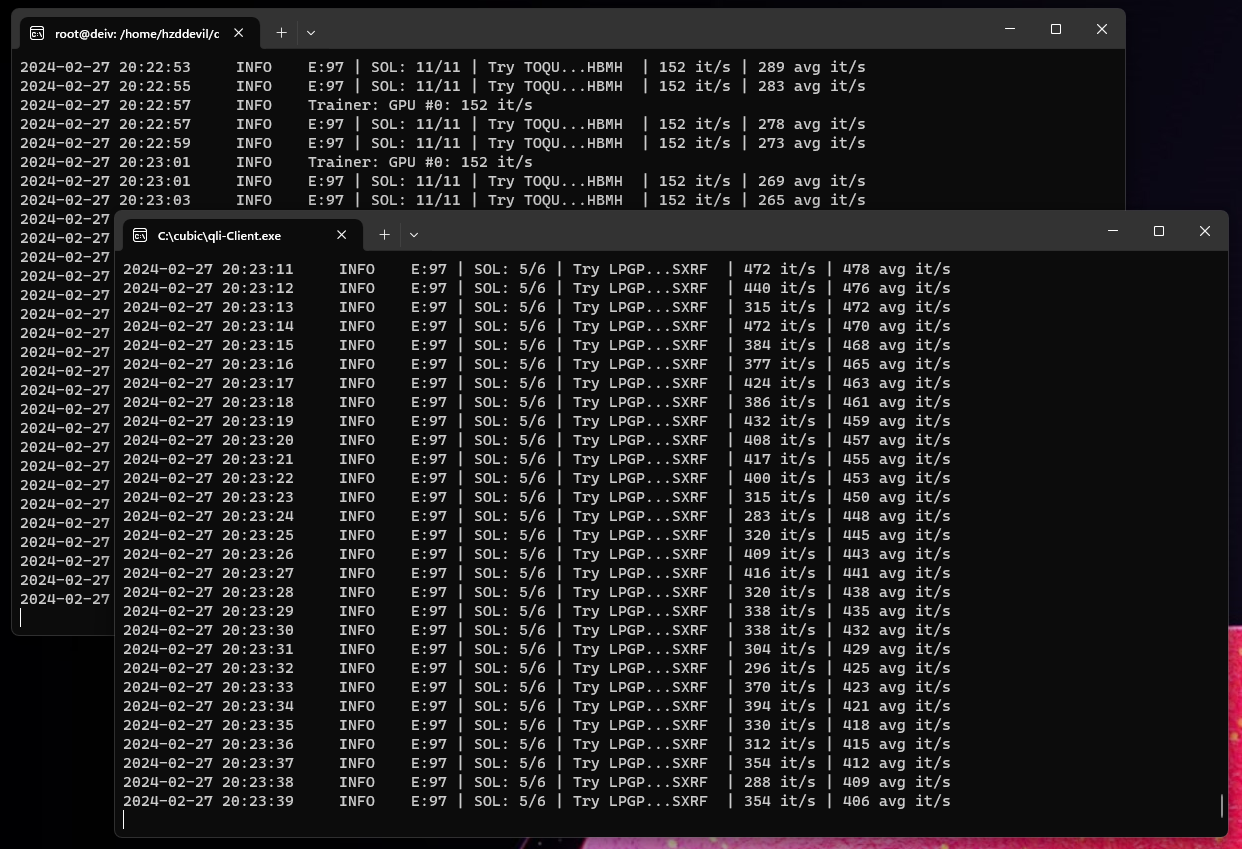
In the previous article, we already talked about how to set up Qubic coin (QBIC) mining for Windows and HiveOs, as well as how to register a wallet and connect to the pool. However, most people who tried to set up Qubic mining on Windows experienced some problems, namely mining on the video card did not start. When starting the miner, a hardware detection error was displayed and mining started only on the CPU, which is exactly what happened in our case. For those who have a similar problem, we are posting an alternative guide on how to set up Qubic mining in GPU+CPU mode under Windows using the Linux Subsystem for Windows version 2 or WSL2.
This is approximately what an error in a miner looks like when mining starts, only with the help of the central processor, and the video card is not used in mining.

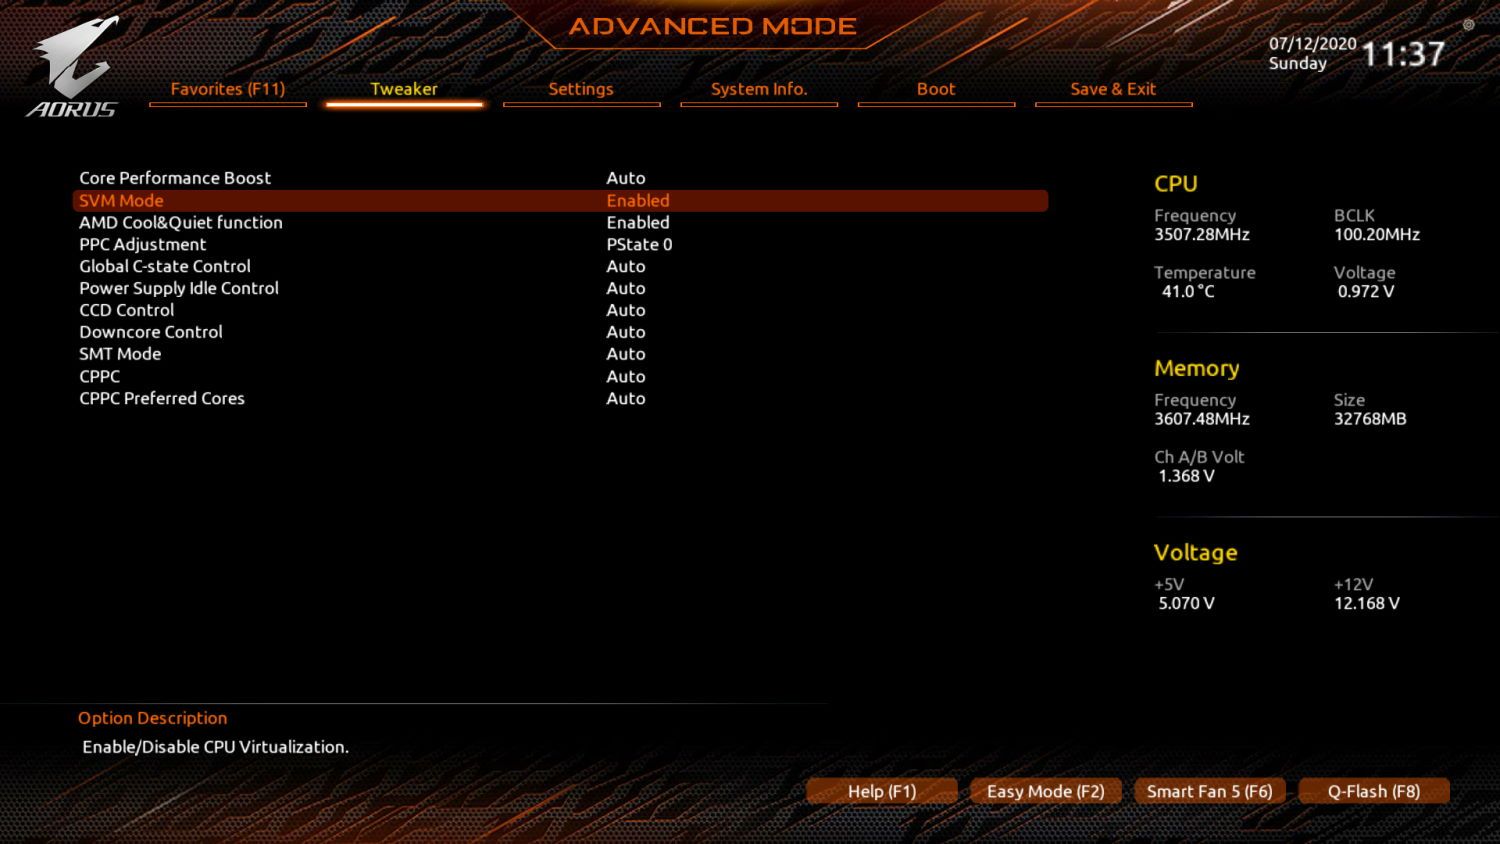
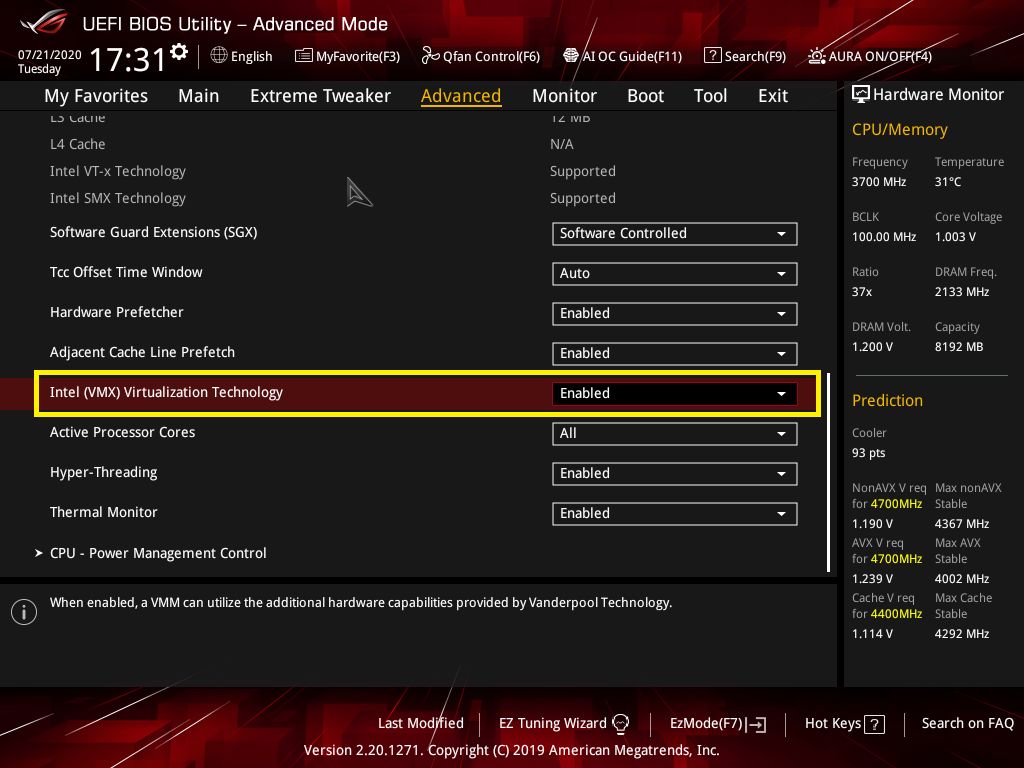
So, let's start installing and configuring WSL2 for Windows. First, check that the processor virtualization option is enabled in the BIOS of your motherboard; for AMD it is called SVM Mode (or AMD-V or Virtualization Technology depending on the manufacturer and model of the motherboard), for Intel it is called Intel VT-x (VT-d ) or Intel Virtualization Technology. Go to the BIOS (UEFI) and enable this option if you had it disabled; without it you will not be able to start WSL2.
Also make sure that you have Windows 10 version 2004 and higher (build 19041 and higher) or Windows 11 installed. If you have an older version, read how to install WSL manually here or upgrade to the appropriate version.
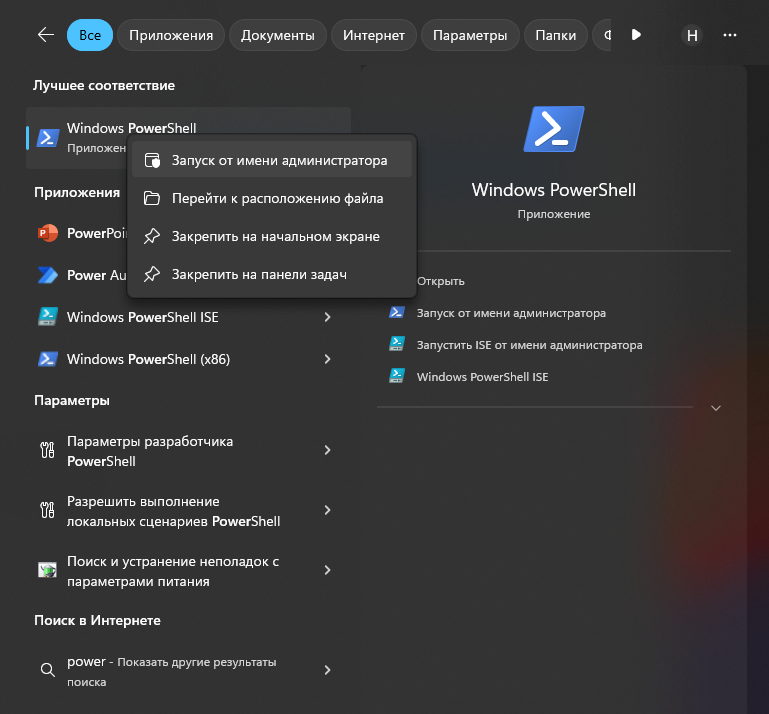
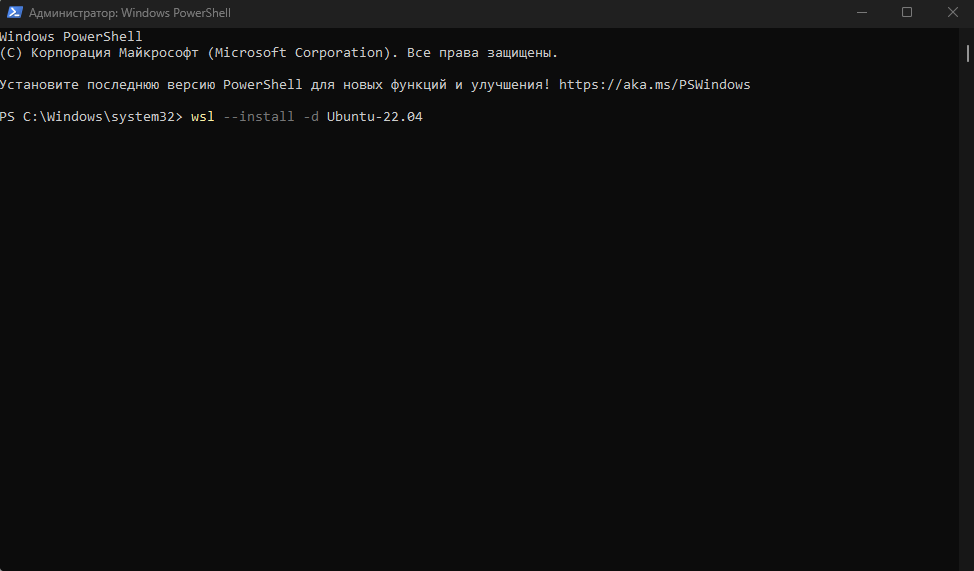
Now you can install everything you need to run WSL with just one command. Open the Power Shell Command Prompt in Administrator mode by right-clicking and selecting Run as Administrator.
Enter the command wsl --install -d Ubuntu-22.04 after which the distribution will be downloaded, installed and you will be transferred to the Ubuntu Linux console. After which you will be asked to create an account name and Root password, do this by following the instructions on the screen.
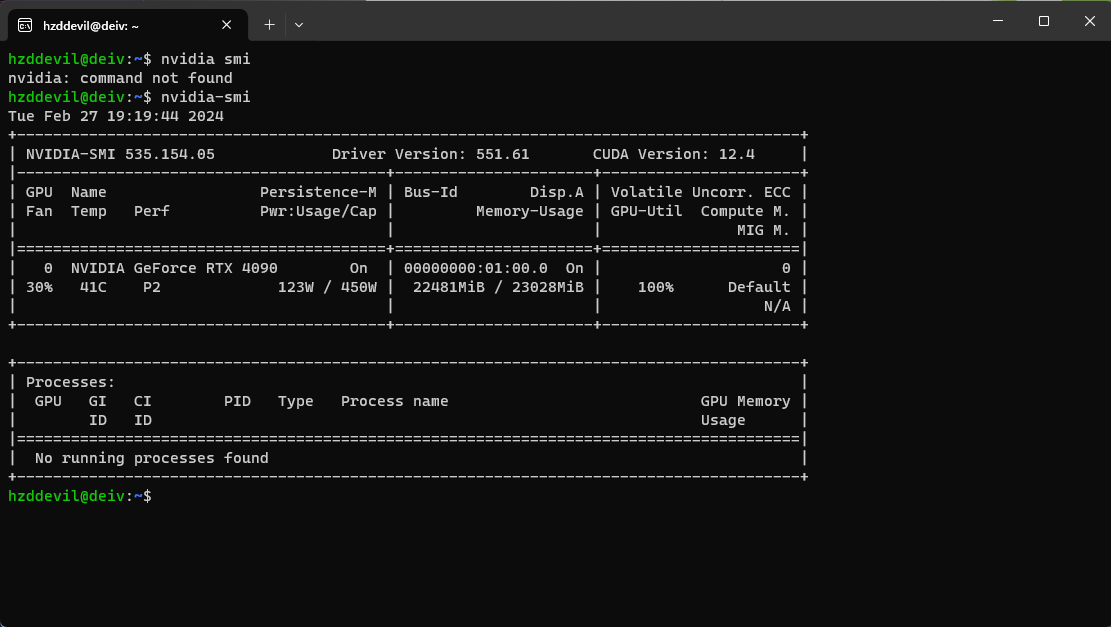
Enter the command nvidia-smi, which will show whether the driver for the Nvidia video card is installed in Linux and its version.
Now go to the Nvidia website to download the updated version of CUDA12 for WSL. Select the following options: Linux -> x86_64 -> WSL-Ubuntu -> 2.0 -> deb (local) as shown in the picture below.
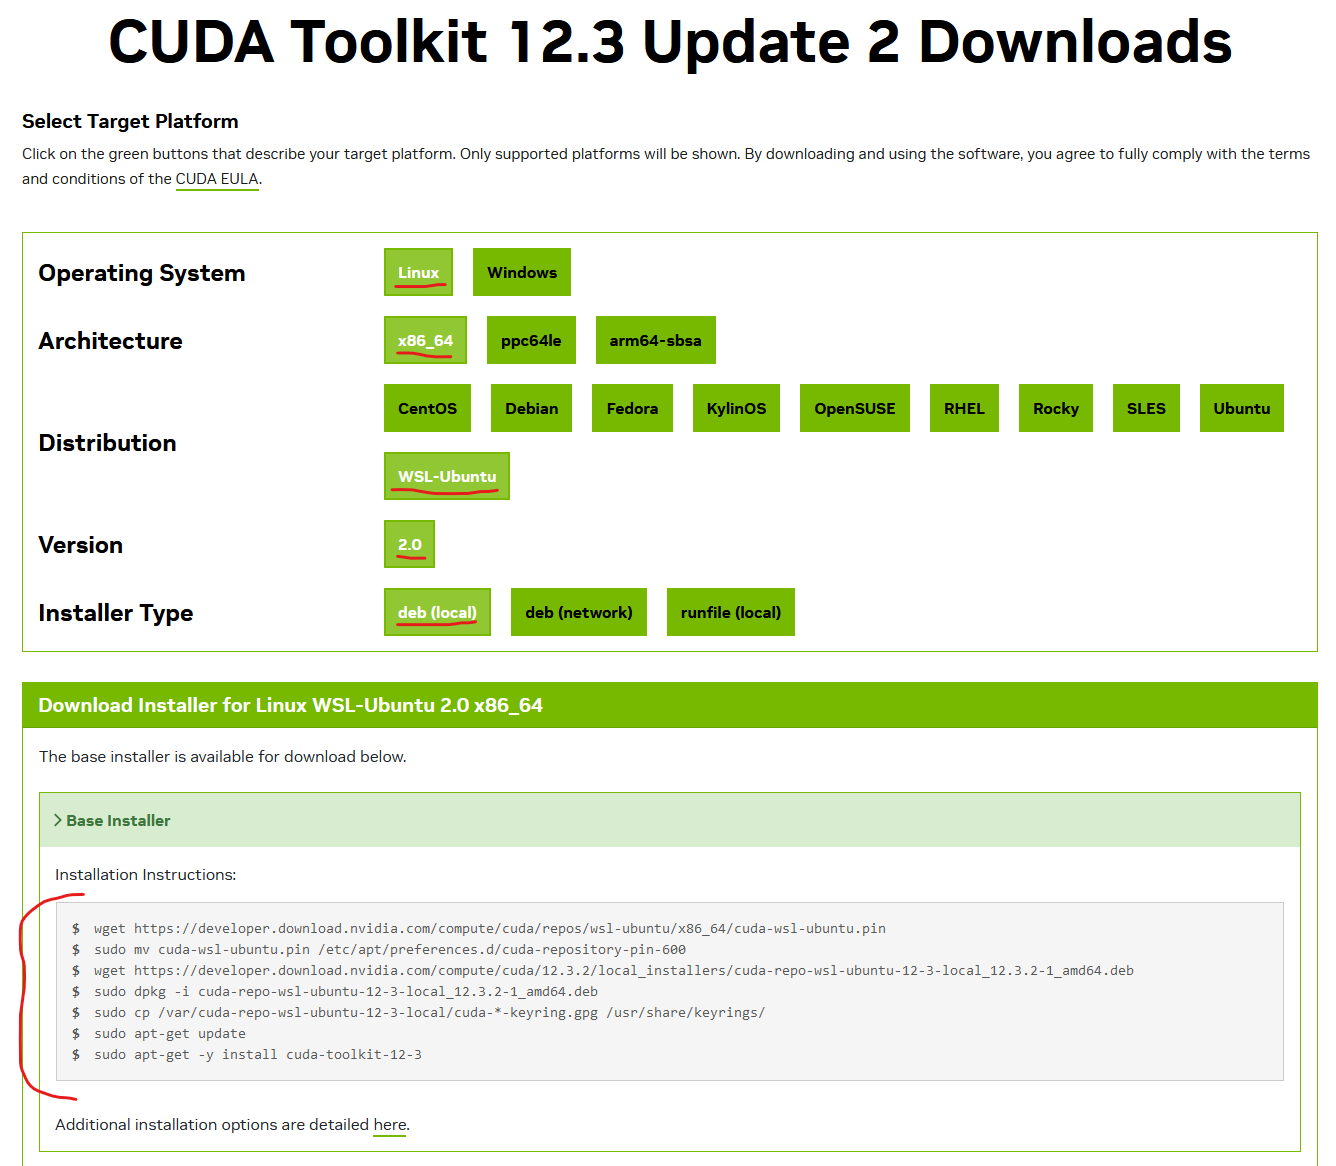
Then we execute in the Linux console all the commands specified in the Base Installer section in order (one line, one command), here they are:
wget https://developer.download.nvidia.com/compute/cuda/repos/wsl-ubuntu/x86_64/cuda-wsl-ubuntu.pin
sudo mv cuda-wsl-ubuntu.pin /etc/apt/preferences.d/cuda-repository-pin-600
wget https://developer.download.nvidia.com/compute/cuda/12.3.2/local_installers/cuda-repo-wsl-ubuntu-12-3-local_12.3.2-1_amd64.deb
sudo dpkg -i cuda-repo-wsl-ubuntu-12-3-local_12.3.2-1_amd64.deb
sudo cp /var/cuda-repo-wsl-ubuntu-12-3-local/cuda-*-keyring.gpg /usr/share/keyrings/
sudo apt-get update
sudo apt-get -y install cuda-toolkit-12-3
After you update CUDA to version 12.3, open the gitHub site of the miner repository in your browser (from which we downloaded the miner for Windows in the previous article, here is the link), and copy the link to the version for Linux.
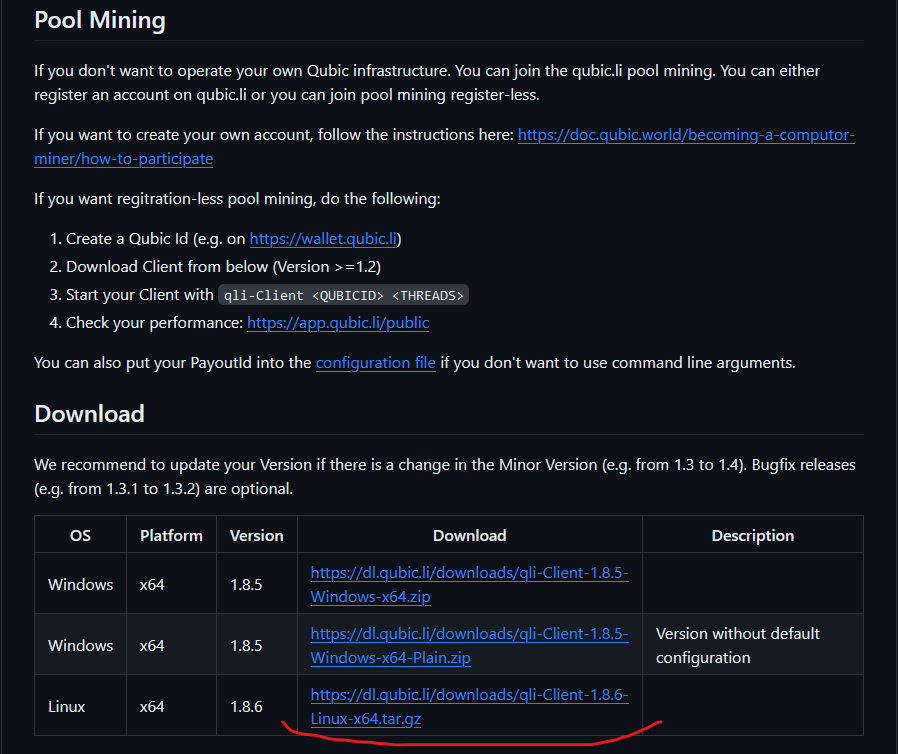
in the Linux console we write the command mkdir qubiс to create a folder, and then the command cd qubiс/ to go inside this folder. Then command wget and paste the copied link. Like this: wget https://dl.qubic.li/downloads/qli-Client-1.8.6-Linux-x64.tar.gz after which the miner will be downloaded to the folder we just created. Now let’s unpack the downloaded archive with the miner using the command tar xzvf qli-Client-1.8.6-Linux-x64.tar.gz


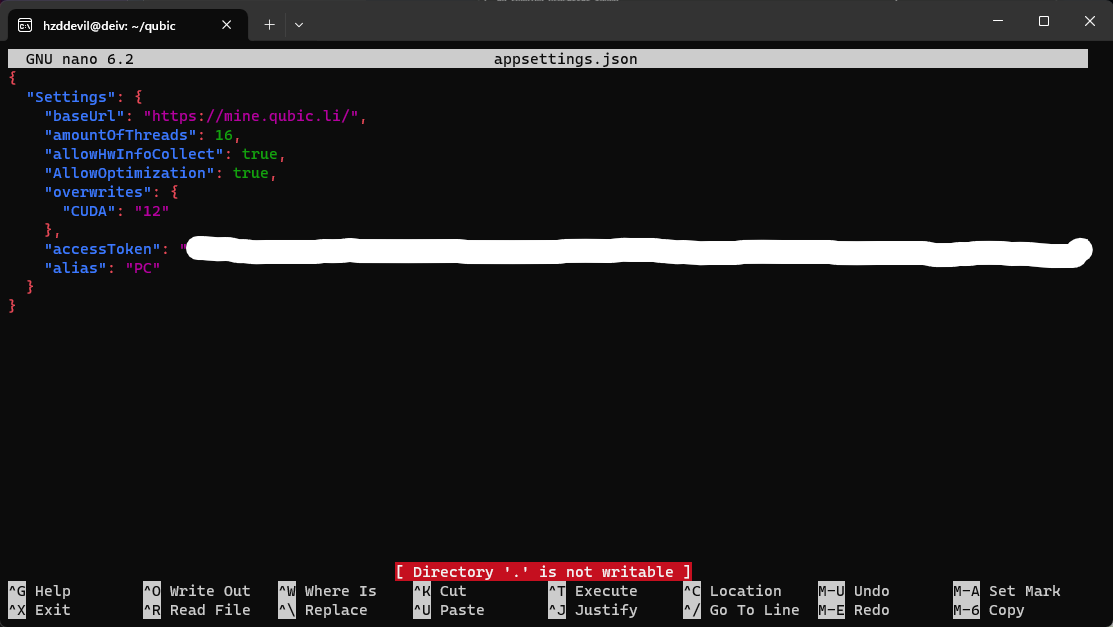
Now edit the miner config through the Nano text editor by entering the command nano appsettings.json, after which a configuration file will open in which you will need to enter our values: first, change your pool access token, where to get it we have already told in the previous article , so we won’t repeat ourselves here. Add the parameters "allowHwInfoCollect": true and "overwrites": {"CUDA": "12"} and then save the changes. Here is an example of my config:
That's it, you can start the miner with the command ./qli-client after which the mining process will start.

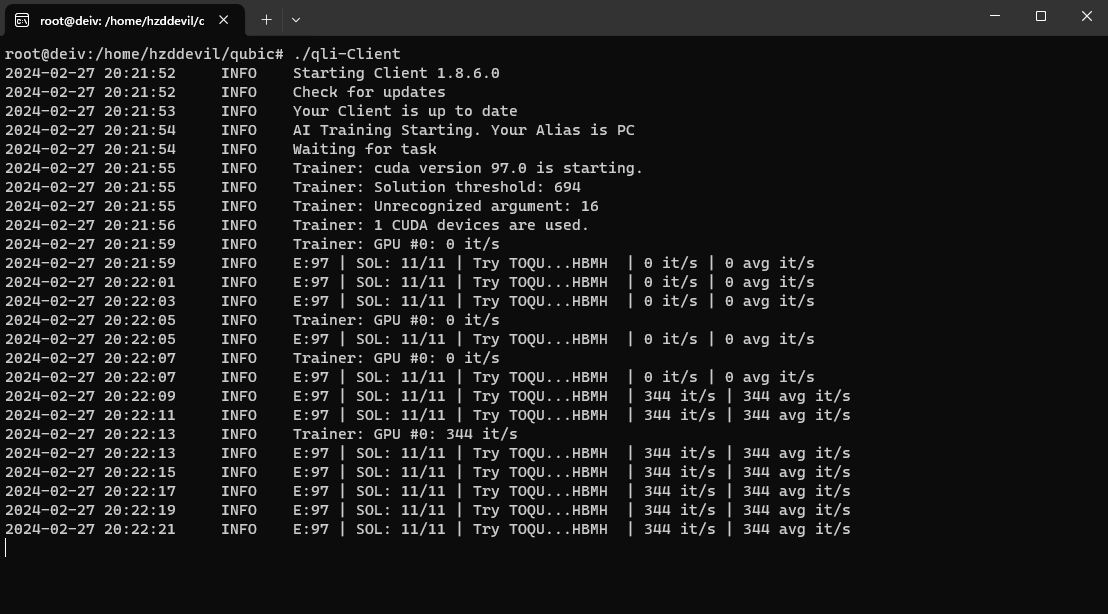
For some reason, in my case, mining started only on the video card, although I specified the number of threads for the processor. In any case, you can run mining on the GPU via WLS and at the same time normal mining in Windows on the CPU, as I did. One more thing, when using a computer on which you will mine via WSL (for example, browsing websites on a browser, watching videos on Youtube), the hashrate drops quite significantly, by 2-3 times, so I recommend setting up mining via WSL on a PC that you do not use during mining, or you will experience performance drawdowns, after all, WSL is virtualization and in any case a certain amount of hardware performance is lost.