")
")
")
")
")


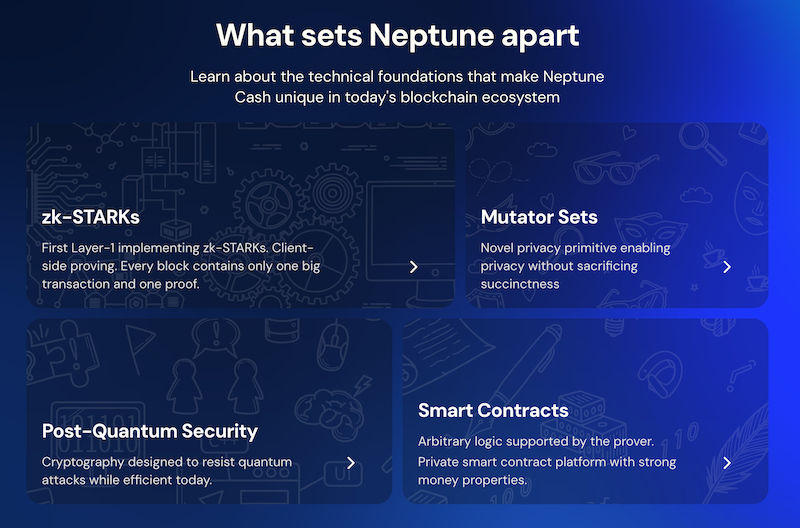
 Neptune Cash is more than just a privacy coin. It is the first blockchain that integrates zk-STARKs directly at the first level and introduces Mutator Sets - a breakthrough in scalable private transactions without compromises. With built-in support for smart contracts, Neptune is not just money - it is a platform for private applications and the future of finance. Moreover, all the cryptography used in the Neptune protocol is post-quantum, meaning it is ready to withstand attacks from future quantum computers. In this article, we will explain how to set up mining for Neptune (NPT). However, it should be noted right away that you will need a powerful graphics card (preferably a 5090 or 4090) and a large amount of RAM - 45 GB or more.
Key Technologies Implemented in Neptune Cash
-
zk-STARKs - Implemented at the first level. Client-side proof. Each block contains only one large transaction and one proof.
-
Mutator Sets - A new privacy primitive that ensures confidentiality without sacrificing brevity.
-
Post-Quantum Security - Cryptography designed to protect against quantum attacks while remaining effective today.
-
Smart Contracts - A private smart contract platform with strong financial properties.
For more details on the technologies implemented in Neptune Cash, you can read on the official website.
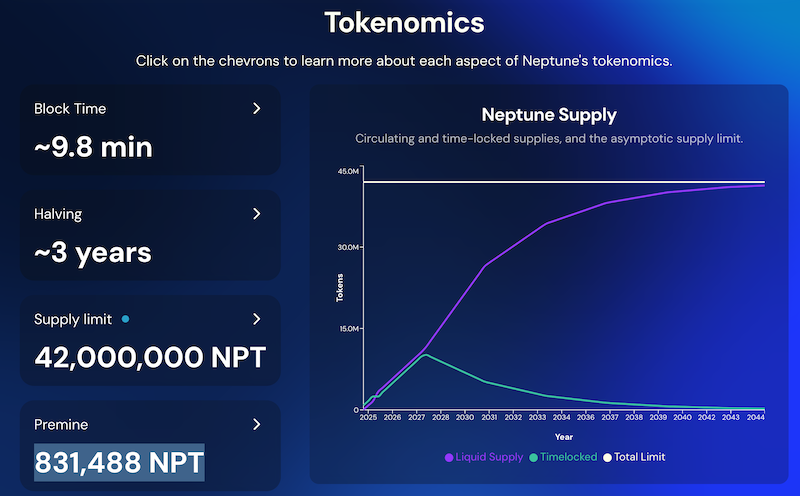
Neptune Tokenomics:
- Average block time: 10 minutes.
- Halving: every 3 years.
- Total supply: 42,000,000 NPT.
- Premine: 831,488 NPT.
Main Links and Requirements
- Official Neptune Cash website.
- Primary mining pool: Drpool.io (PPLNS, currently 0% fee).
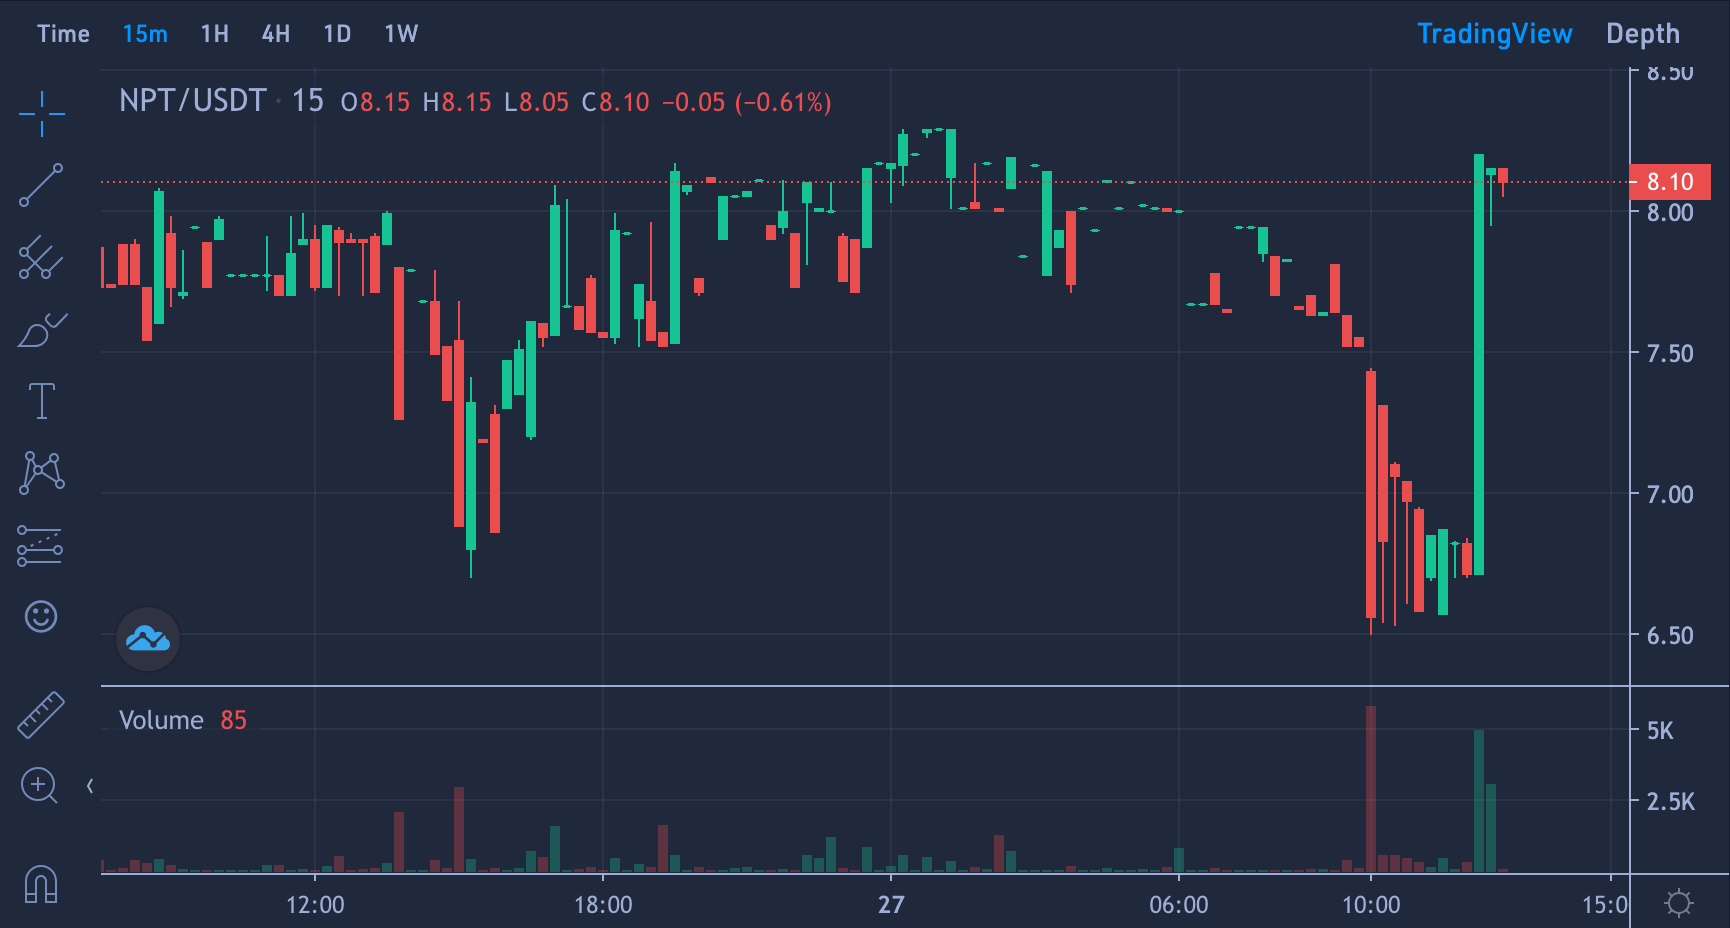
- Exchange for selling Neptune Cash: Safetrade.com. The coin is currently trading at around $8.
- GPU miner for Neptune Cash.
- Wallets: Official Neptune Core and VXB Neptune Wallet with a graphical interface. We recommend using the latter.
- Operating systems: HiveOS or Ubuntu 18.04+.
- System requirements for the rig/computer: at least 45 GB of RAM (mining software uses about 40 GB). Powerful Nvidia graphics card, preferably GeForce RTX 5090 or RTX 4090. Minimum 22+ GB of video memory.
Miner Parameters
The miner supports several parameters, namely: -g for selecting the device number (starting from 0) and -m for setting the mining mode.
For example, if you have only one graphics card, use -g 0. If you have 3 graphics cards and want only the 1st and 3rd to mine: -g 0,2.
Regarding the mining mode parameter -m: for graphics cards with more than 40 GB of video memory (e.g., professional accelerators like A100), use -m 0. For GPUs with 30+ GB (e.g., RTX 5090 -m 1. For GPUs with 23+ GB (e.g., RTX 4090) -m 2. For GPUs with 22+ GB -m 3. For all other supported GPUs, there is a legacy mode -m 42. In this mode, GPU+CPU is used, and you can also specify the number of threads with -t (one thread per 3 GB of video memory).
# -g
# Indexes of GPUs to use (starts from 0)
# Specify multiple times to use multiple GPUs
# Example: -g 0  -g 0,1,2,3

# -m
# GPU Memory: 0, 1, 2 (default: 42)
# 0: GPU with 40GB+ memory
# 1: GPU with 30GB+ memory
# 2: GPU with 23GB+ memory
# 3: GPU with 22GB+ memory
# 42: GPU + CPU,3G * N

# -t N It only works with the -m 42option.

./dr_neptune_prover -p stratum+tcp://neptune.drpool.io:30127 -w drpoolaccount.xxx -g 0,1,2,3 -m 2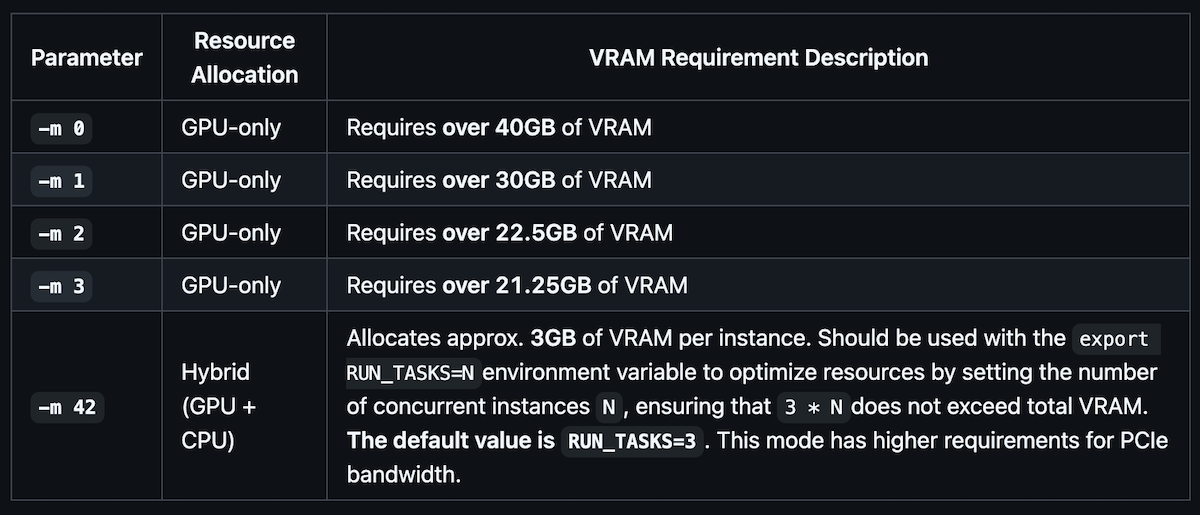
Detailed Instructions for Starting Neptune Cash Mining
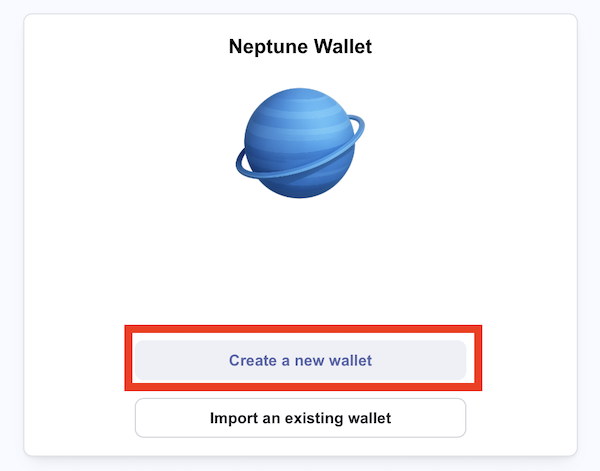
Step 1: Wallet Setup
- Go to the GitHub page for the alternative VXB Neptune Wallet and install it. Versions are available for all popular OSes, including Windows, macOS, and Linux, as well as the project source code. Launch the wallet and click
- Create a new wallet. Come up with and enter a wallet password, then click "Create a new wallet".
- Write down or save your seed phrase to a text file - it will be needed if you want to restore your wallet or install it on another device.
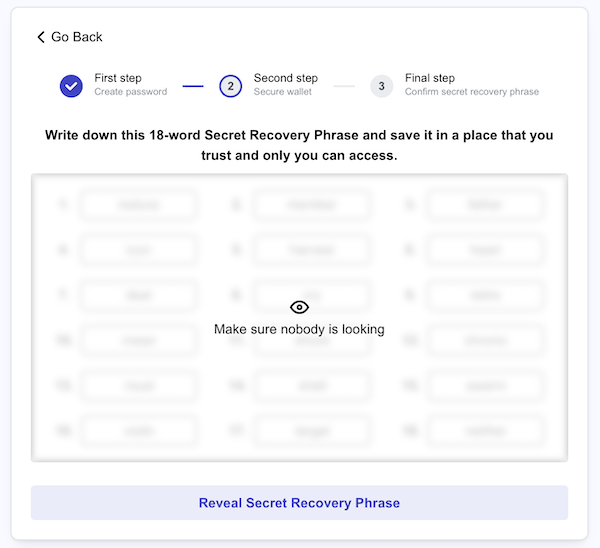
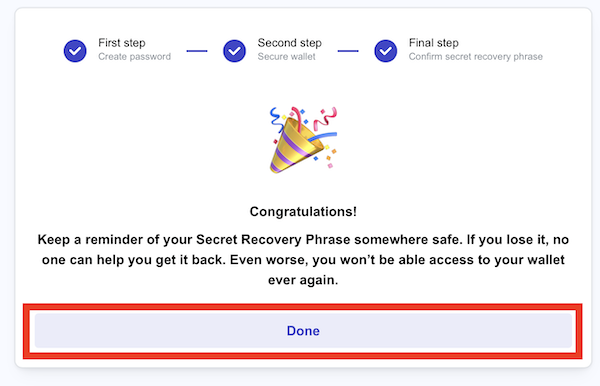
- Verify that you have correctly recorded the seed phrase and click "Confirm Secret Recovery Phrase".
- Congratulations, the account is created - click "Done".
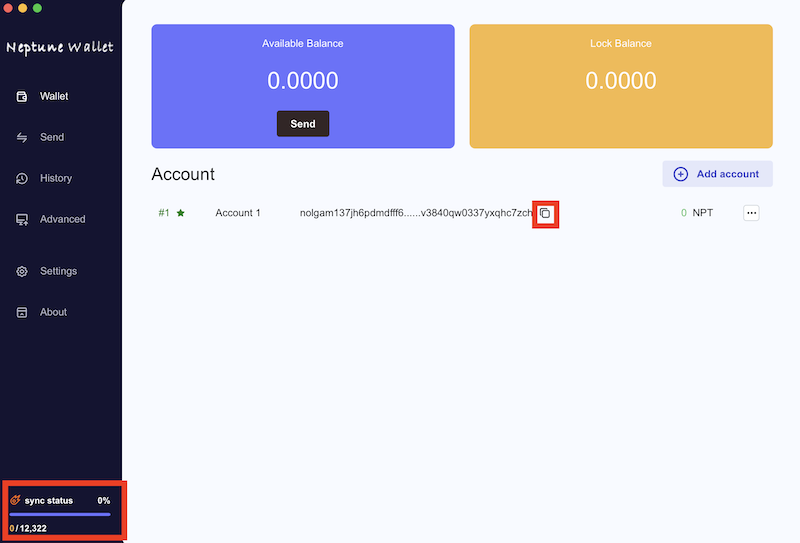
- Copy your wallet address (also known as the public address) as shown in the image below; you will need it for mining setup. Also, wait for the synchronization process to complete so you can use the wallet and make transactions.
Step 2: Pool Registration
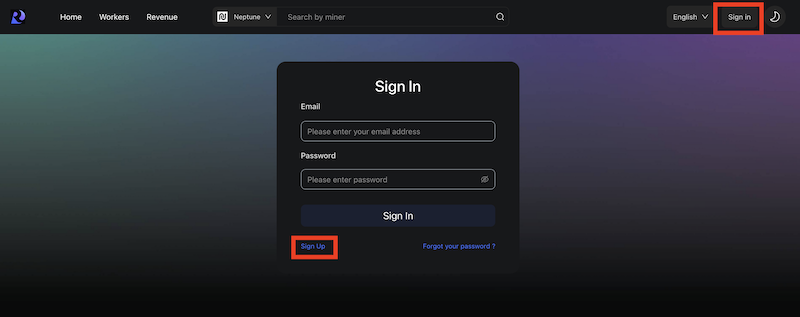
- Go to the Drpool.io pool website and click "Sign In" in the top-right corner, then "Sign Up" to register.
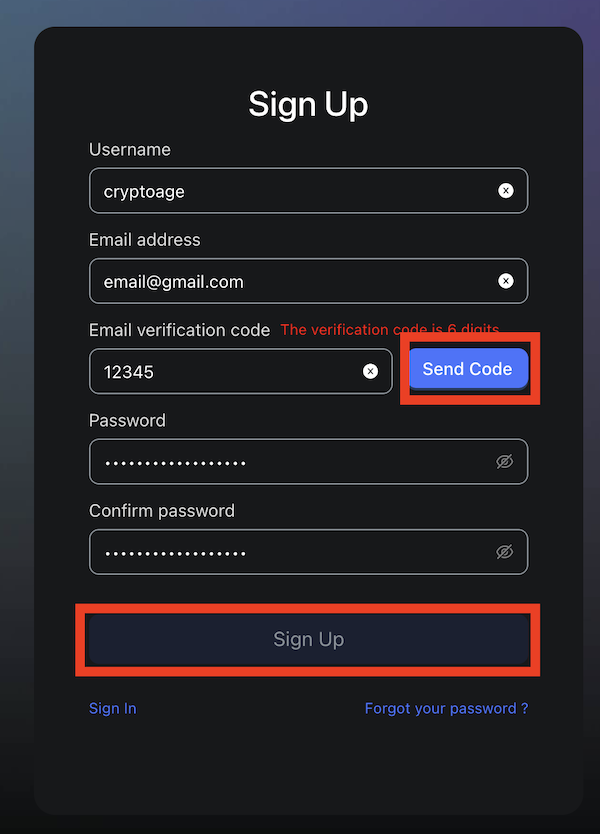
- Enter your name, email, click "Send code", then check your email and paste the code from the new message into "Email verification code". Come up with and enter a password, then click "Sign Up".
- Congratulations, the account is created. Now log in with your new account by clicking "Sign In".
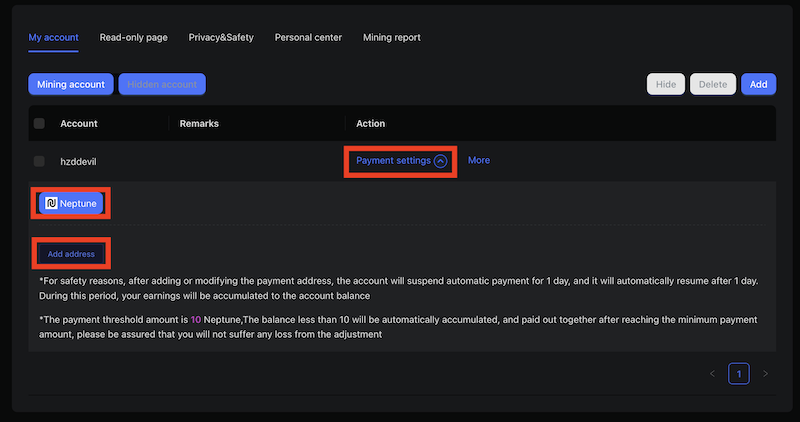
- Go to account settings and specify your payout wallet, which we obtained in Step 1. To do this, on the My account tab, click Payment settings -> Neptune -> Add address.
- Enable two-factor authentication. Scan the QR code and add it to a two-factor authentication app, such as Google Authenticator.
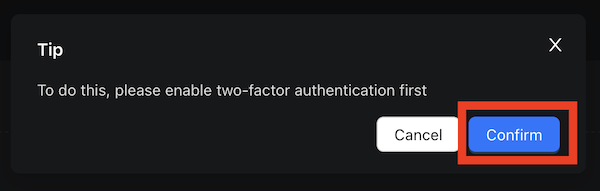
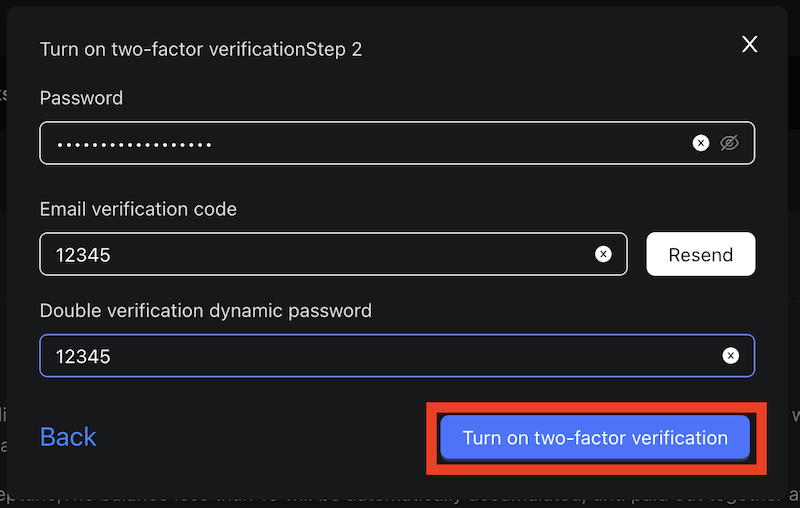
- Re-enter your password, the code from the email message, and the code from the 2FA app, then click "Turn on two-factor verification" to activate it.
- Add your payout address in the Address field, enter the 6-digit code from the 2FA app, and click Confirm to confirm.
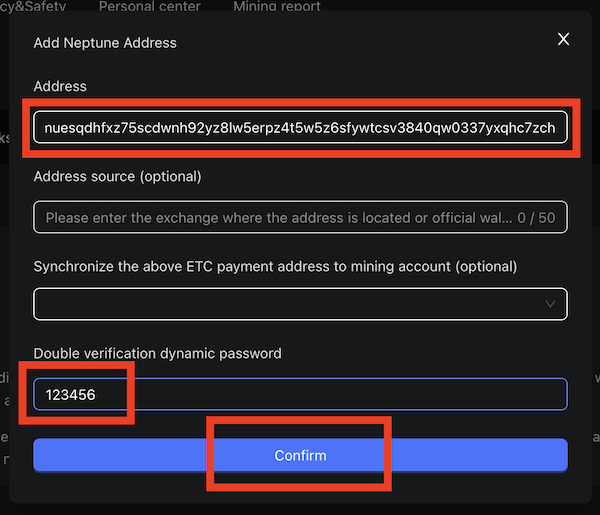
- Confirm the payout address binding by following the link in the email.
- The minimum payout threshold is 10 Neptune coins (~$80).
Step 3.1: Mining Setup on HiveOS
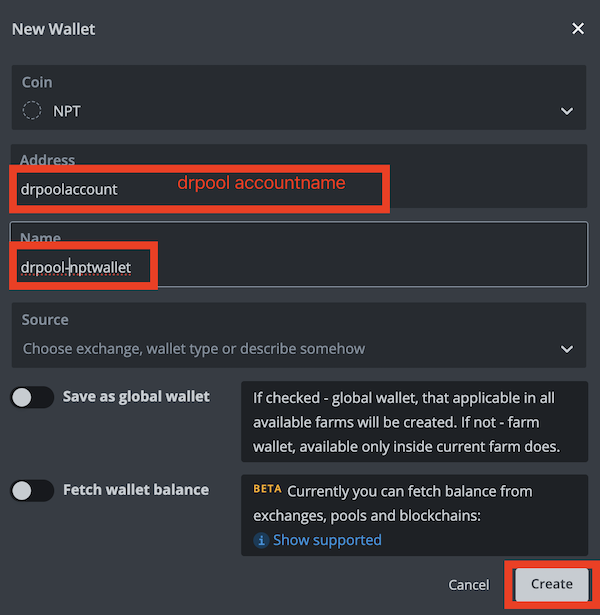
- Create a new wallet (New wallet). In the address field, enter your pool account name from Drpool that you registered in Step 2. Give the wallet a name, e.g., drpool-npt wallet. Click Create.
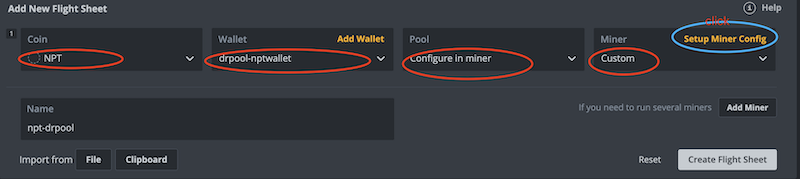
- Go to flight sheets and create a new one. Select the NPT coin, the wallet we just created, Configure in miner, Custom, then click Setup Miner Config.
- Configure the custom miner using the example in the image below. Miner name: nptprover, Installation URL: https://pub-e1b06c9c8c3f481d81fa9619f12d0674.r2.dev/image/v2/nptprover-3.4.1.tar.gz, Hash algorithm: ----, Wallet and worker template: %WAL%.%WORKER_NAME%, Pool URL: stratum+tcp://neptune.drpool.io:30127. Also, specify additional parameters in the Extra config arguments field - we already discussed them in detail in the "Miner Parameters" section. For example, if your rig has one RTX 4090 graphics card like mine, enter -g 0 -m 2. After setup, click Apply Changes.

- Now you can launch the flight sheet, and the mining process will start.
- To view miner logs in HiveOS, use the following command:
tail -f /root/hive/miners/custom/nptprover/nptprover.log -n 100
Step 3.2: Mining Setup on Ubuntu 18.04+
- Download and install Neptune-core and create a new wallet with neptune-cli generate-wallet, or install vxb_neptune_wallet.
- Download the miner:
wget https://pub-e1b06c9c8c3f481d81fa9619f12d0674.r2.dev/image/v2/ubuntu_20-dr_neptune_prover-3.4.1.tar.gz - Unpack and configure the miner:
tar -zxvf ubuntu_20-dr_neptune_prover-3.4.1.tar.gz cd dr_neptune_prover && chmod +x inner_guesser.sh run_guesser.sh stop_guesser.sh dr_neptune_prover - Configure the account. Edit the inner_guesser.sh file and update the drpool account name.
- GPU acceleration. Specify the miner parameters suitable for you in the inner_guesser.sh file. For example:
./dr_neptune_prover --pool stratum+tcp://neptune.drpool.io:30127 --worker $accountname -g 0 -m 2 - Start the mining process:
./start_guesser.sh - To view miner logs, use the following command:
tail -n 100 -f guesser.log - To stop mining, enter:
./stop_guesser.sh